Introduction
Bubble is a no-code platform that allows you to build web applications without writing code. This guide will show you how to integrate Helicone with your Bubble application to get observability and logging for your LLM API calls.Integration Steps
1
Create a Helicone account and generate an API Key
Log into Helicone or create an account. Once you have an account, generate an API key.
Make sure to generate a write-only API key.
2
Configure API settings in Bubble
In your Bubble application, go to the API section and set up your LLM provider (e.g., OpenAI, Anthropic).See Figure 1 below for an example configuration.
3
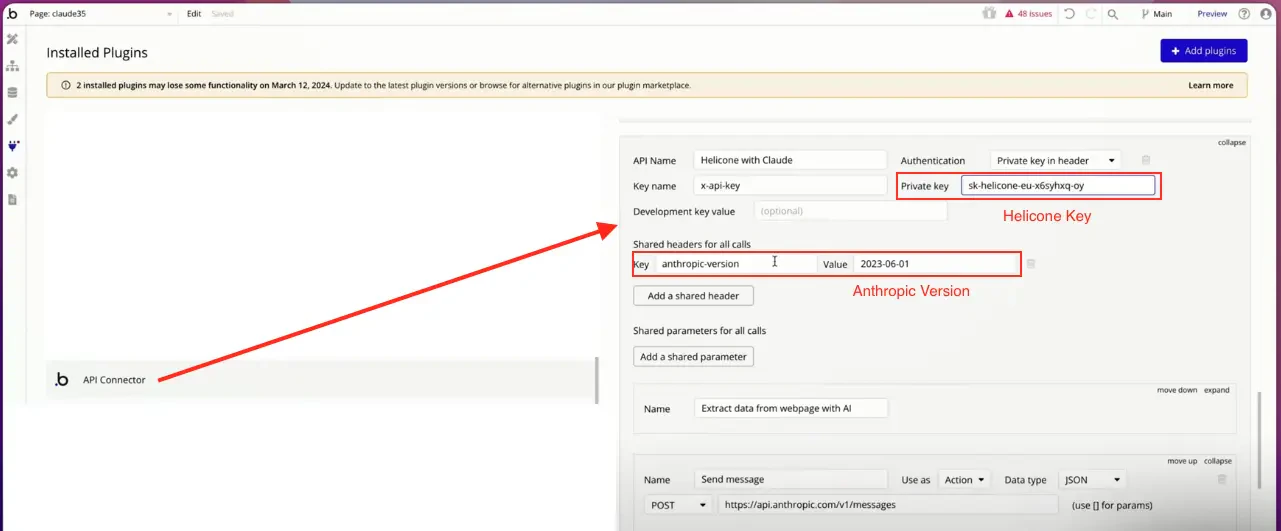
Add Helicone headers
In the API settings, add the following headers:See Figure 2 below for an example header configuration.
-
Add a private header for your Helicone API key:
- Name:
Helicone-Auth - Value:
Bearer your_helicone_api_key
- Name:
-
Add a private header for your LLM provider’s API key:
- For OpenAI:
- Name:
Authorization - Value:
Bearer your_openai_api_key
- Name:
- For Anthropic:
- Name:
X-API-Key - Value:
your_anthropic_api_key
- Name:
- For OpenAI:
Read about how to connect other LLM providers here.
Make sure to mark the API key headers as private to keep them secure.
4
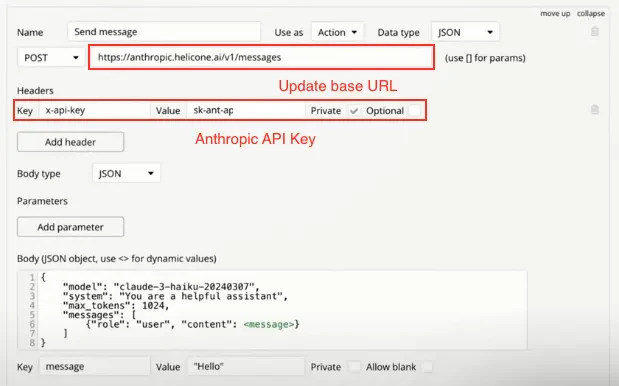
Update the API endpoint
Change the API endpoint to use Helicone’s proxy. For example, if you’re using OpenAI:Make sure to use the appropriate Helicone endpoint for your LLM provider.
5
(Optional) Add user tracking
To track requests by user, add another header:
- Name:
Helicone-User-Id - Value:
"current_user's_email"(or any unique identifier)
Anthropic Example Configurations
Video Tutorial
For a detailed walkthrough of the integration process, check out this video tutorial:Verifying the Integration
After setting up the integration:- Make a test API call from your Bubble application.
- Go to your Helicone dashboard.
- Check the “Requests” section to see if your test call appears.
- You can view detailed information about each request, including cost and performance metrics.
Troubleshooting
- If you don’t see requests in your Helicone dashboard, double-check that you’ve updated the API endpoint to use Helicone’s proxy.
- Ensure that all required headers are correctly set and that API keys are valid.
- If using user tracking, make sure the
Helicone-User-Idheader is properly formatted and not marked as private.