What are prompt experiments?
Helicone’s prompt experiments are designed to help you tune your LLM prompt, test it on production data, and verify your iterations with quantifiable data.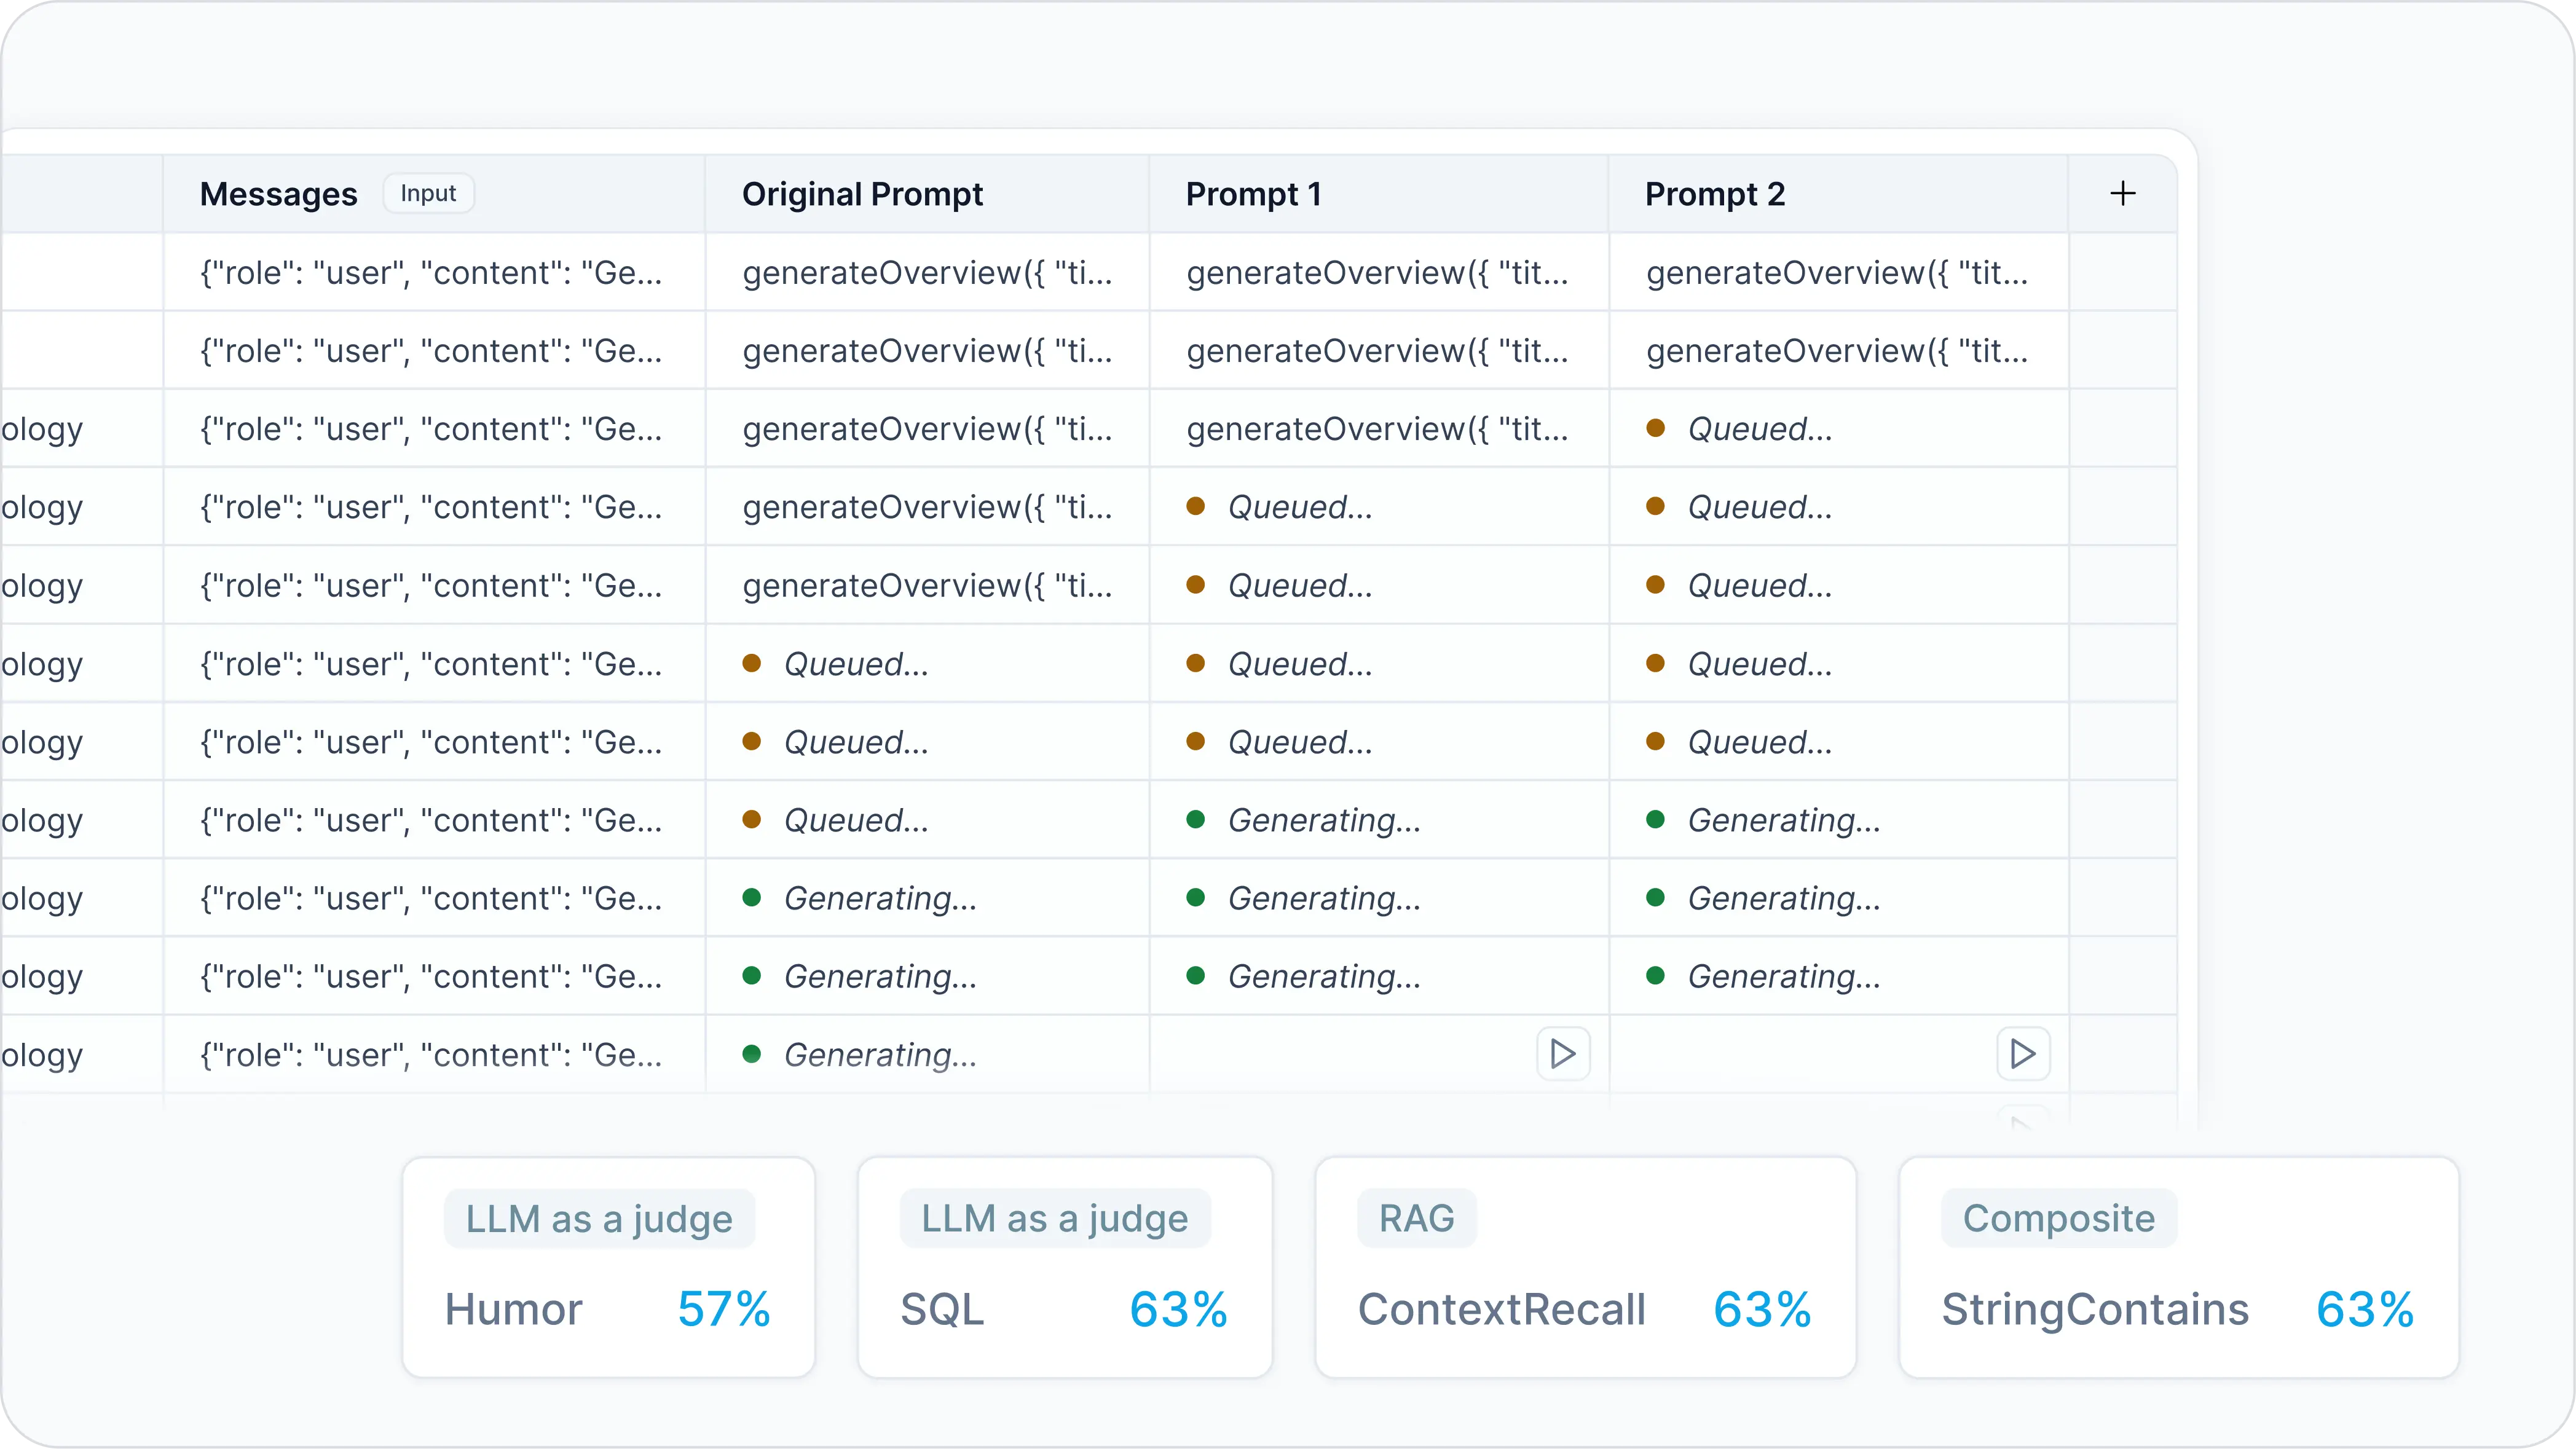
Why experiment with prompts?
- Prevent regression: Prompt engineering is iterative. Engineers want to prevent regression with each prompt change.
- Model update: LLMs are sensitive to prompt changes. As new models with advanced capabilities come out, prompts that worked previously can become less effective.
- Quick feedback loop: Instead of waiting for user feedback, get feedback immediately and adjust before pushing to production.
What is the recommended workflow?
- Create a new experiment in Helicone
- Create new prompt variations
- Add input rows
- Create and run custom evaluators
- Push changes to production
Quick Start
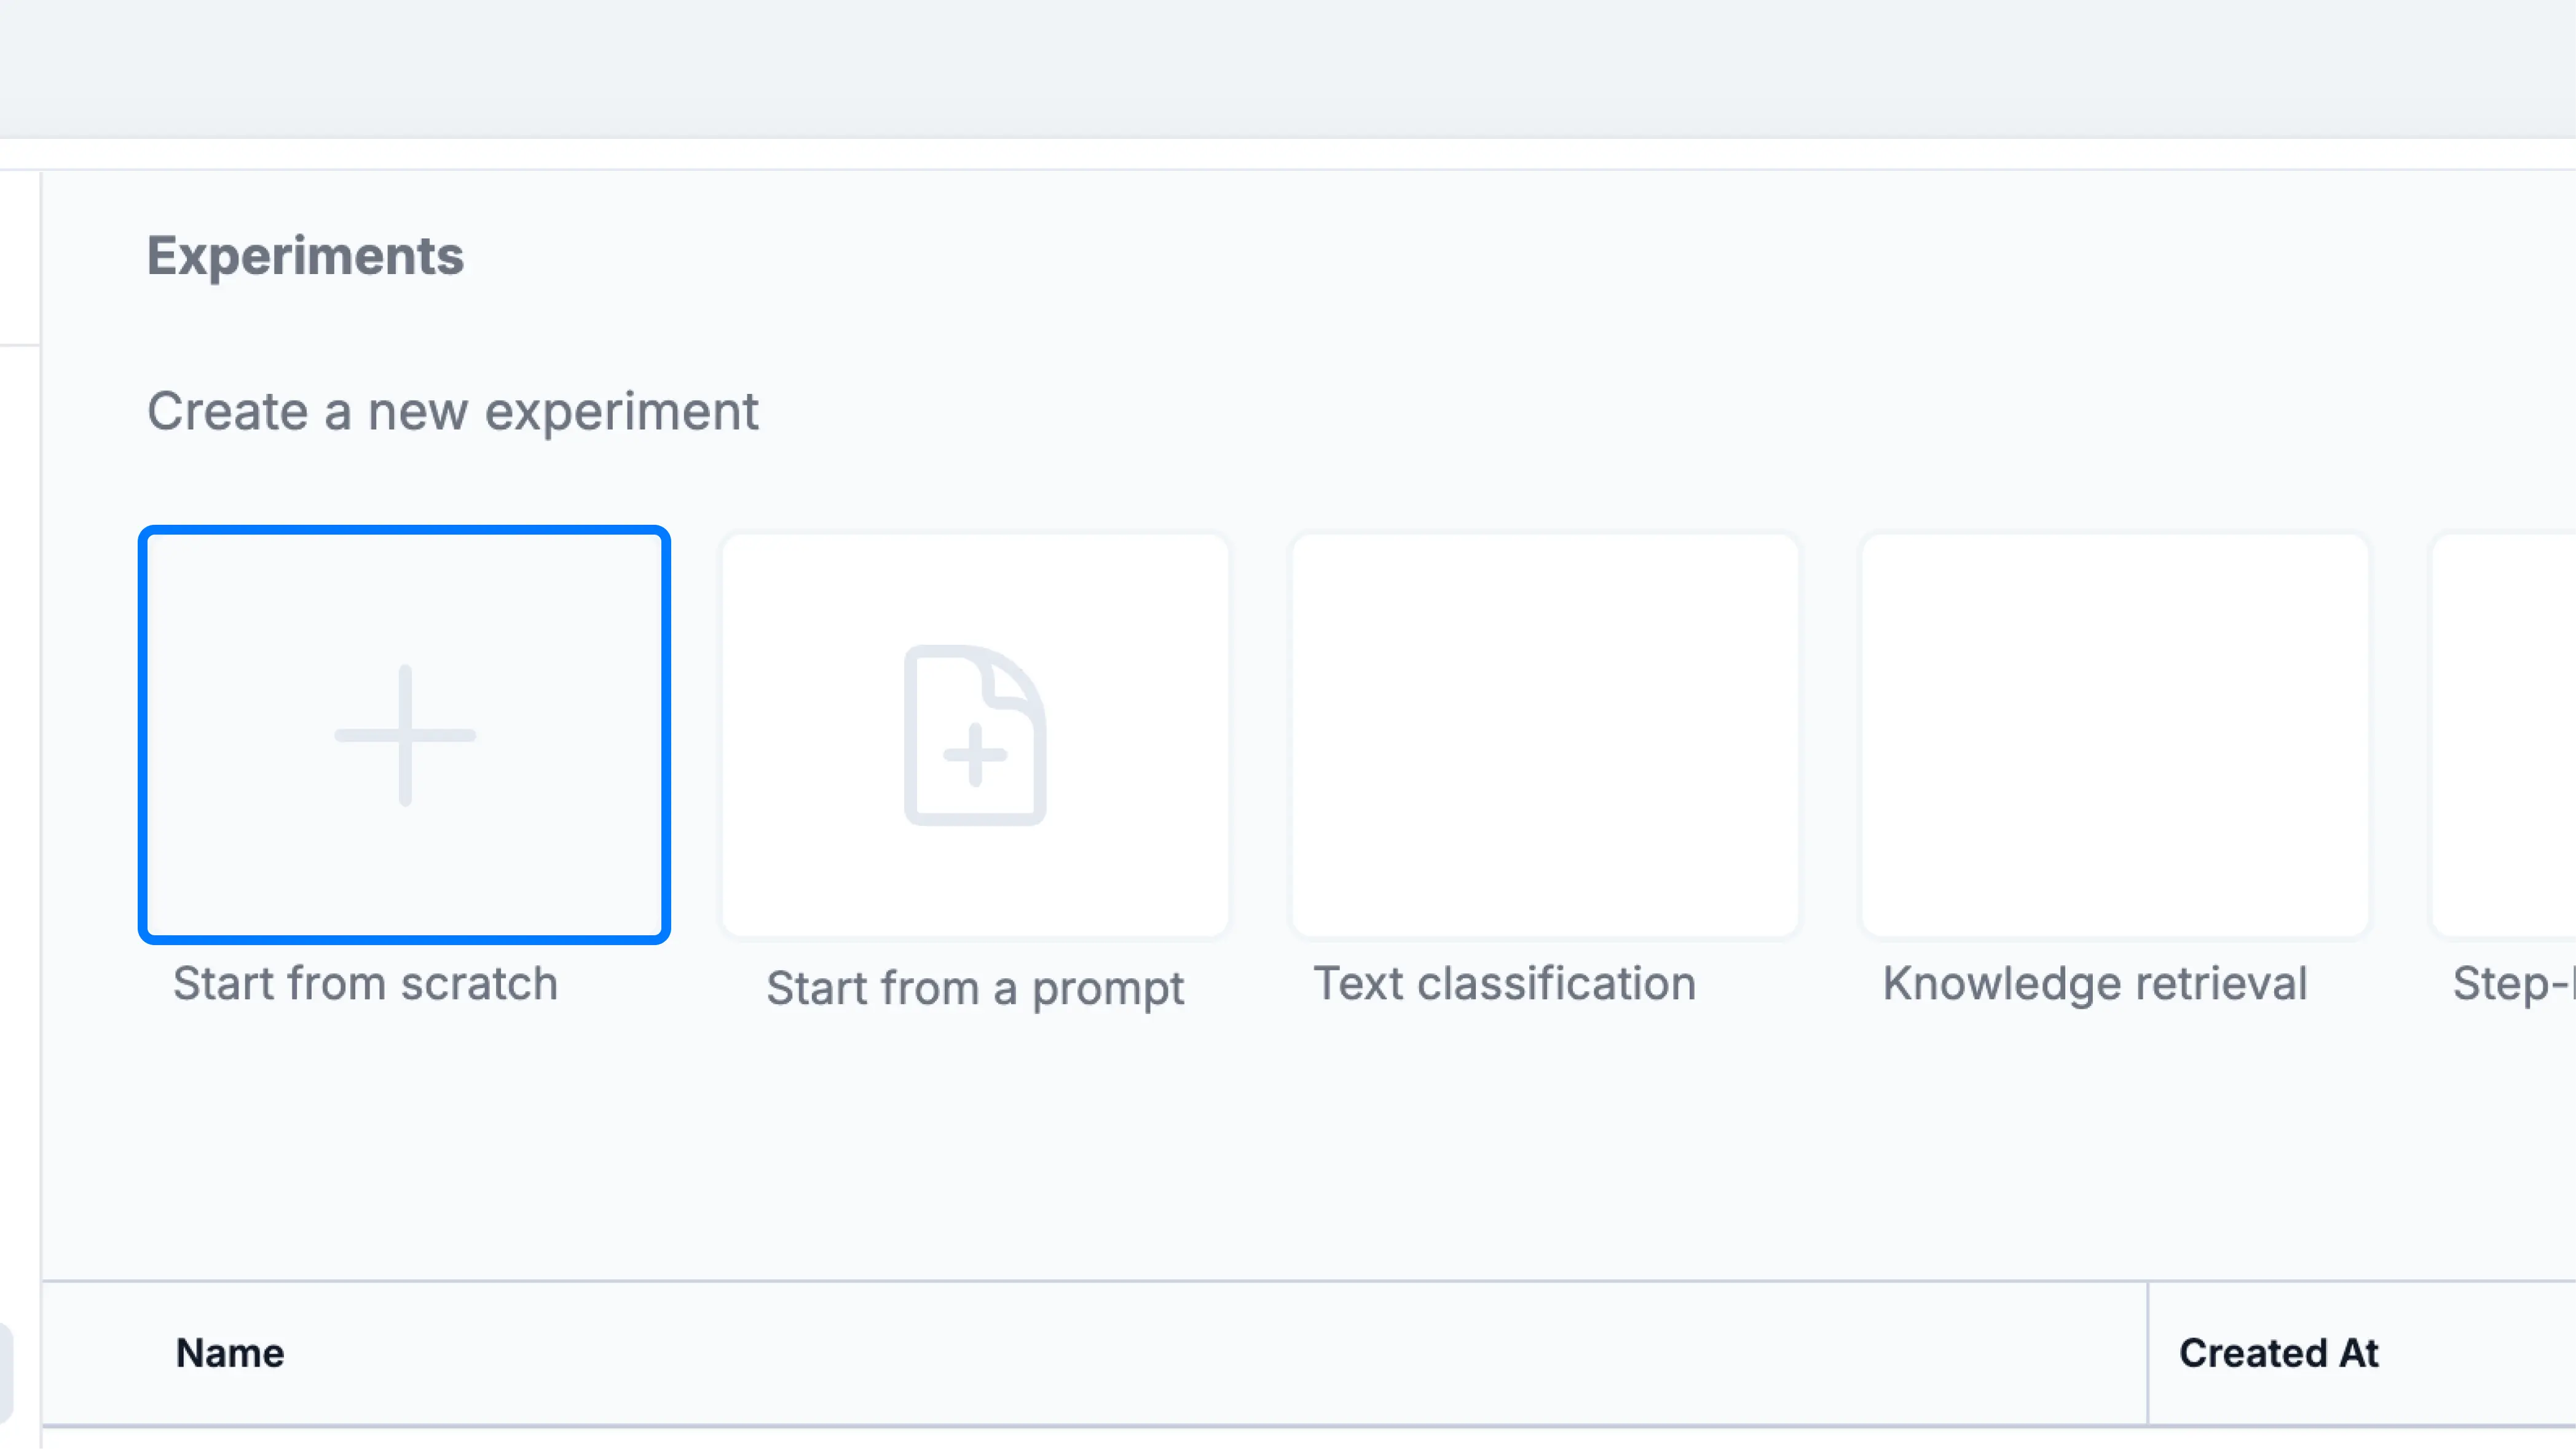
1. Create a new experiment
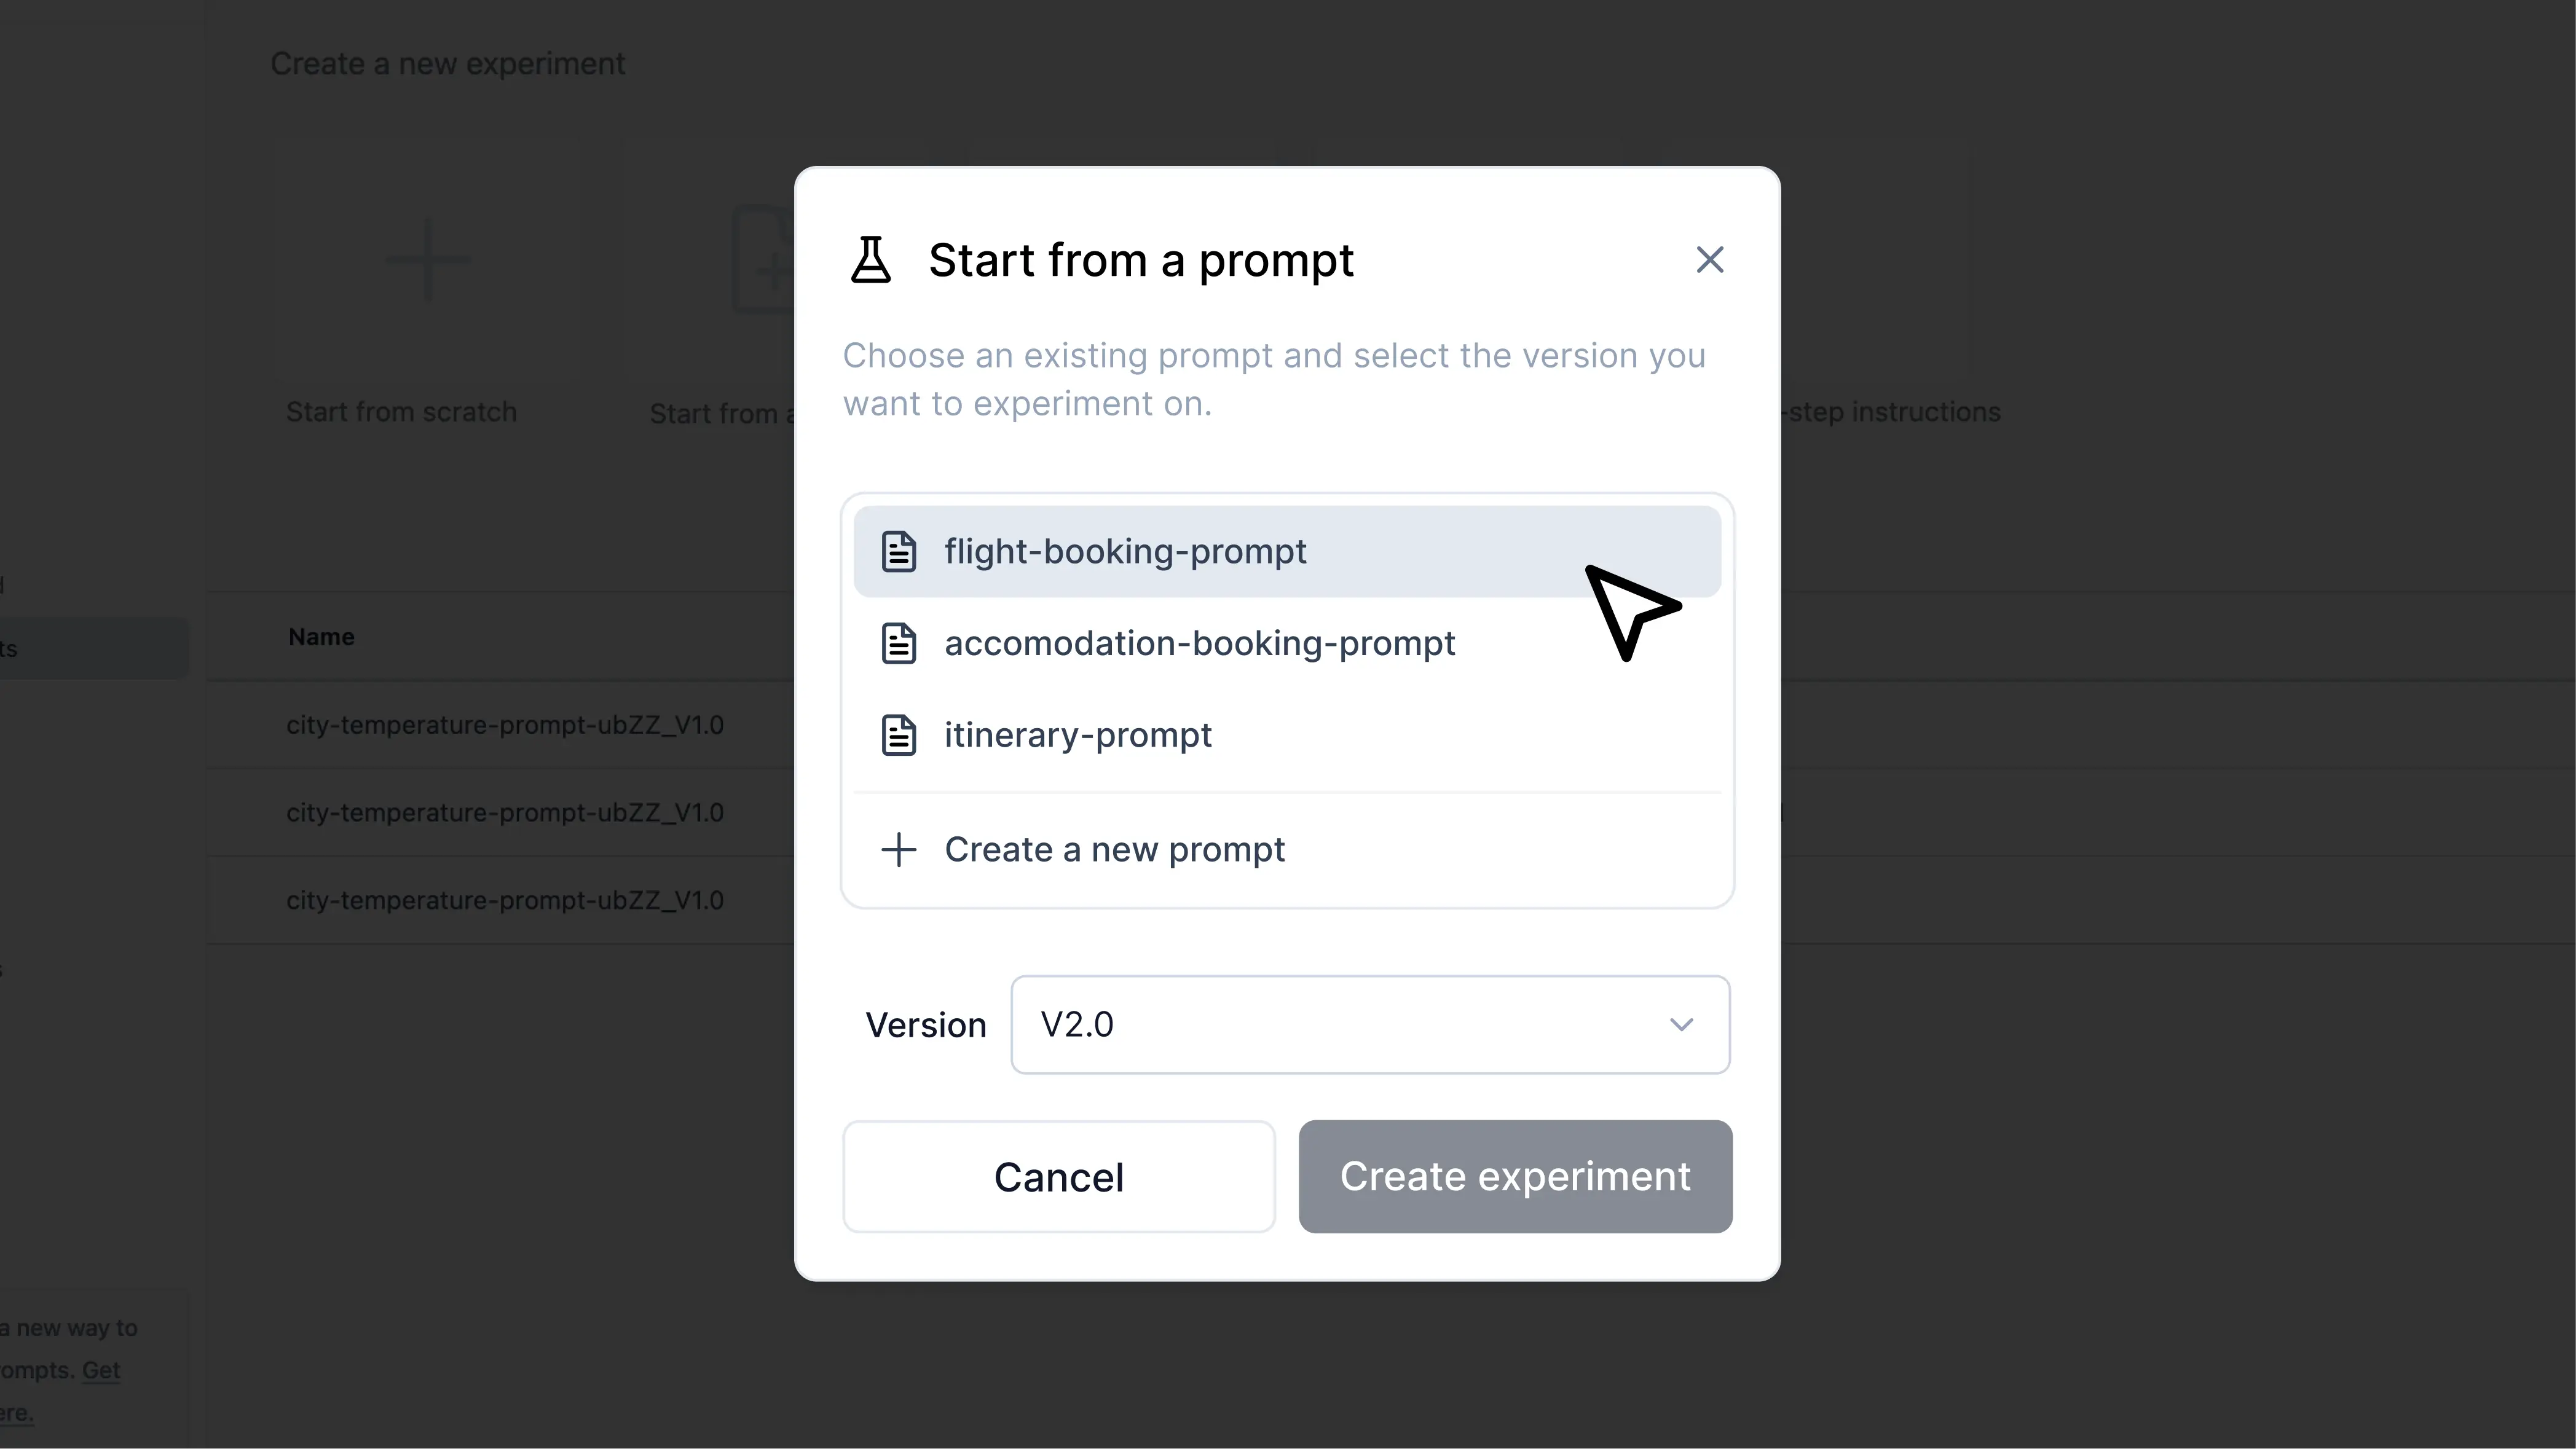
There are a few ways to do this:Method 1: Start with a prompt
If you have an existing prompt in Helicone, head to theExperiment tab. Click on start from a prompt, then choose the desired prompt version.
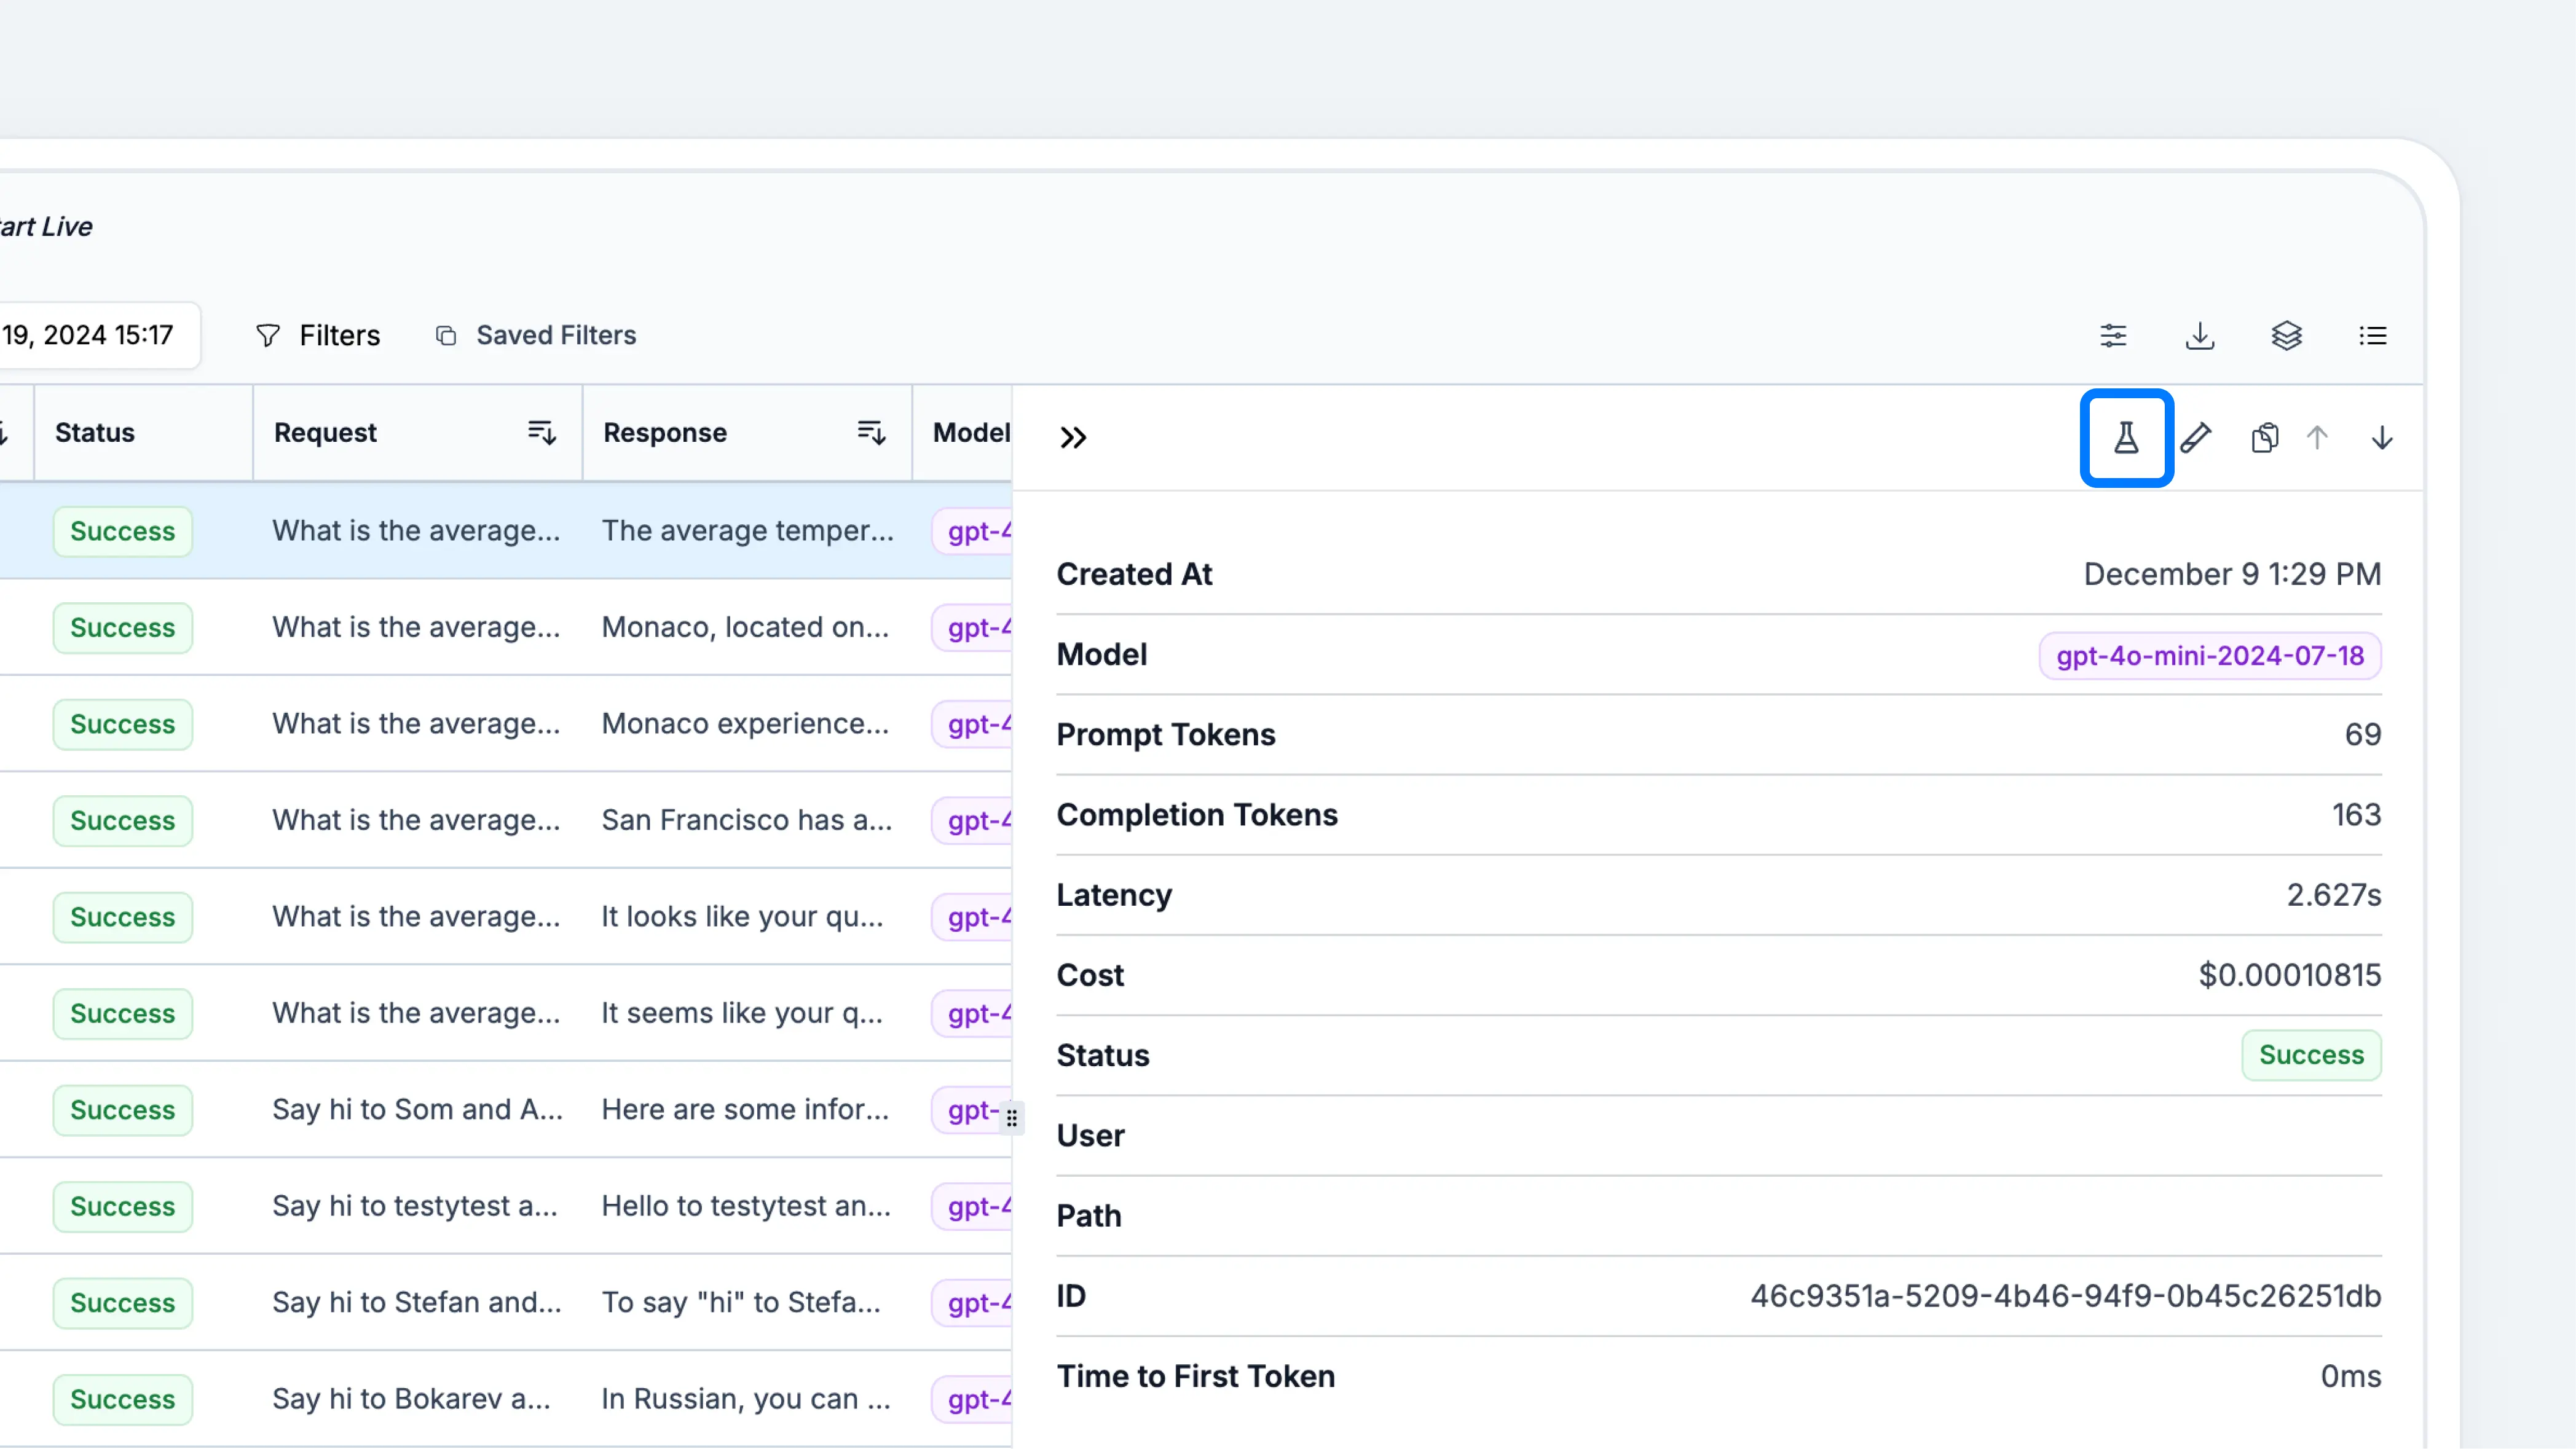
Method 2: Start with a request
If you don’t have an existing prompt, we recommend choosing this method or starting from scratch (method 3). Head to theRequests tab. Open the desired request, then click on the experiments icon. You should see an experiment being generated for the prompt associated with this request.
Method 3: Start from scratch
Head to theExperiment tab, then click on Start from scratch. A helper prompt will be generated for you; you can edit it by clicking on the cell.
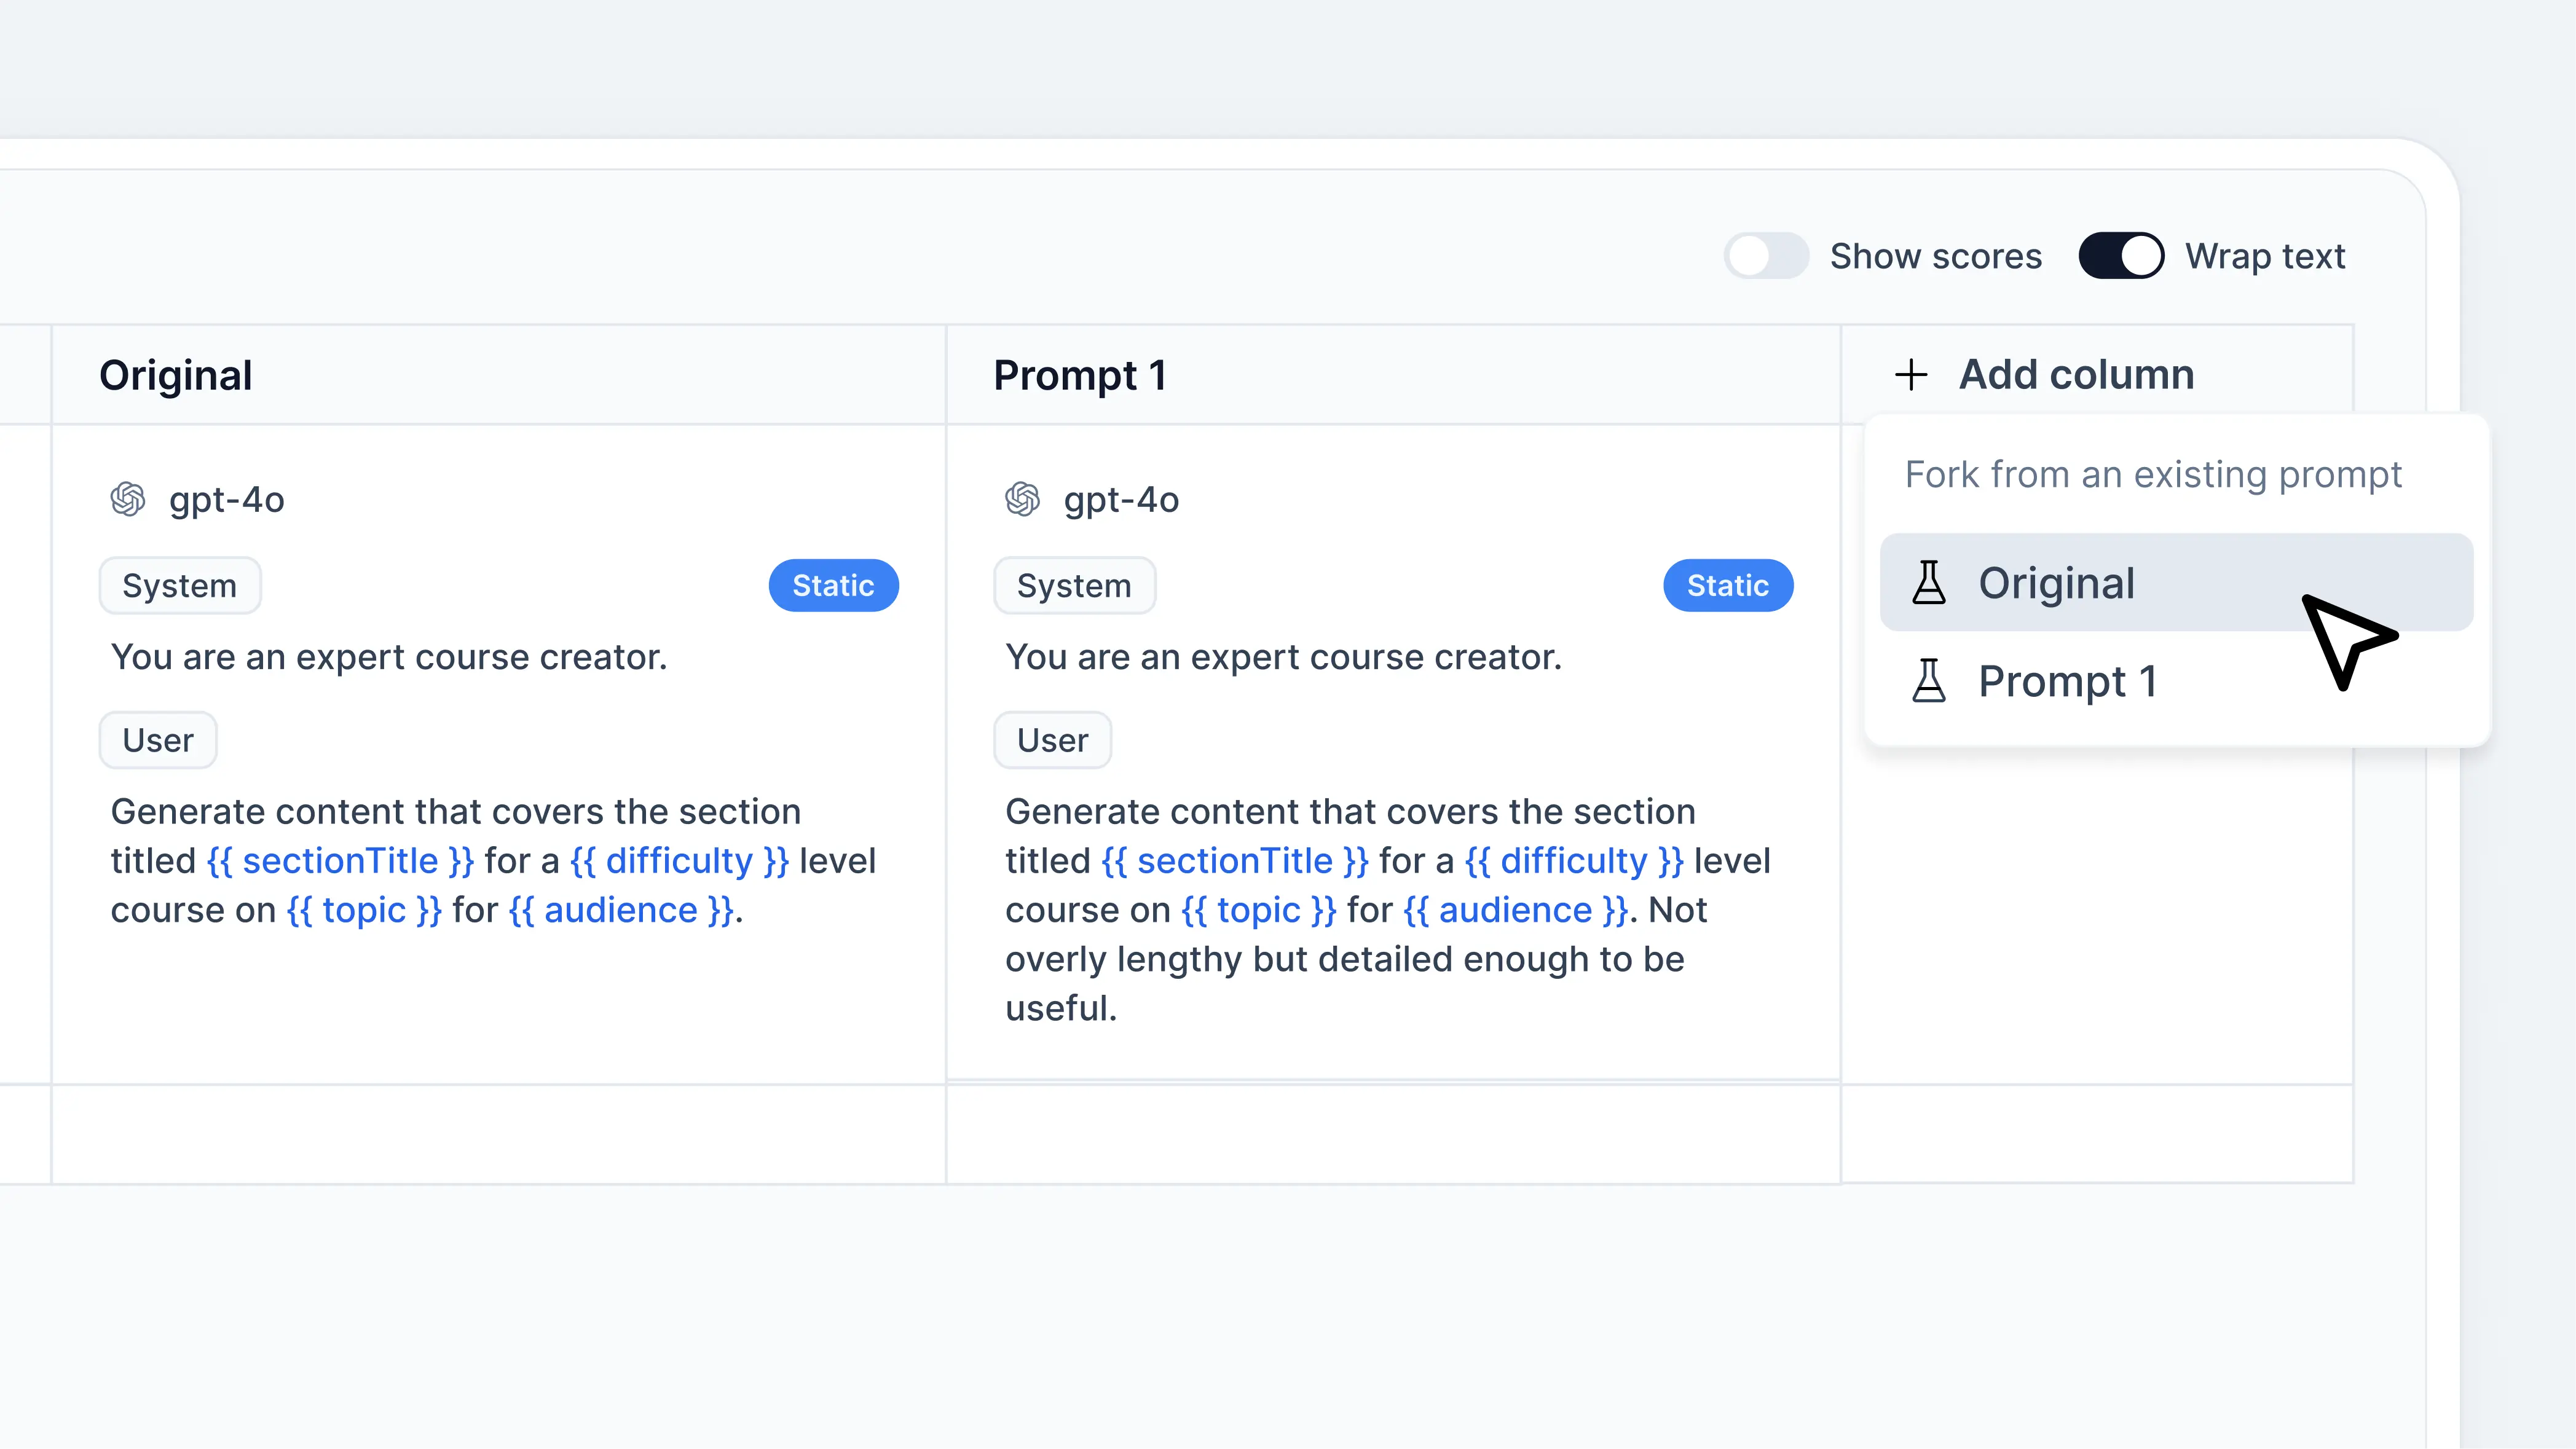
2. Create new prompt variations
To create a new prompt, clickAdd column and select a prompt that you want to fork from.
Keep in mind that you can only fork from an existing prompt in the Experiment.
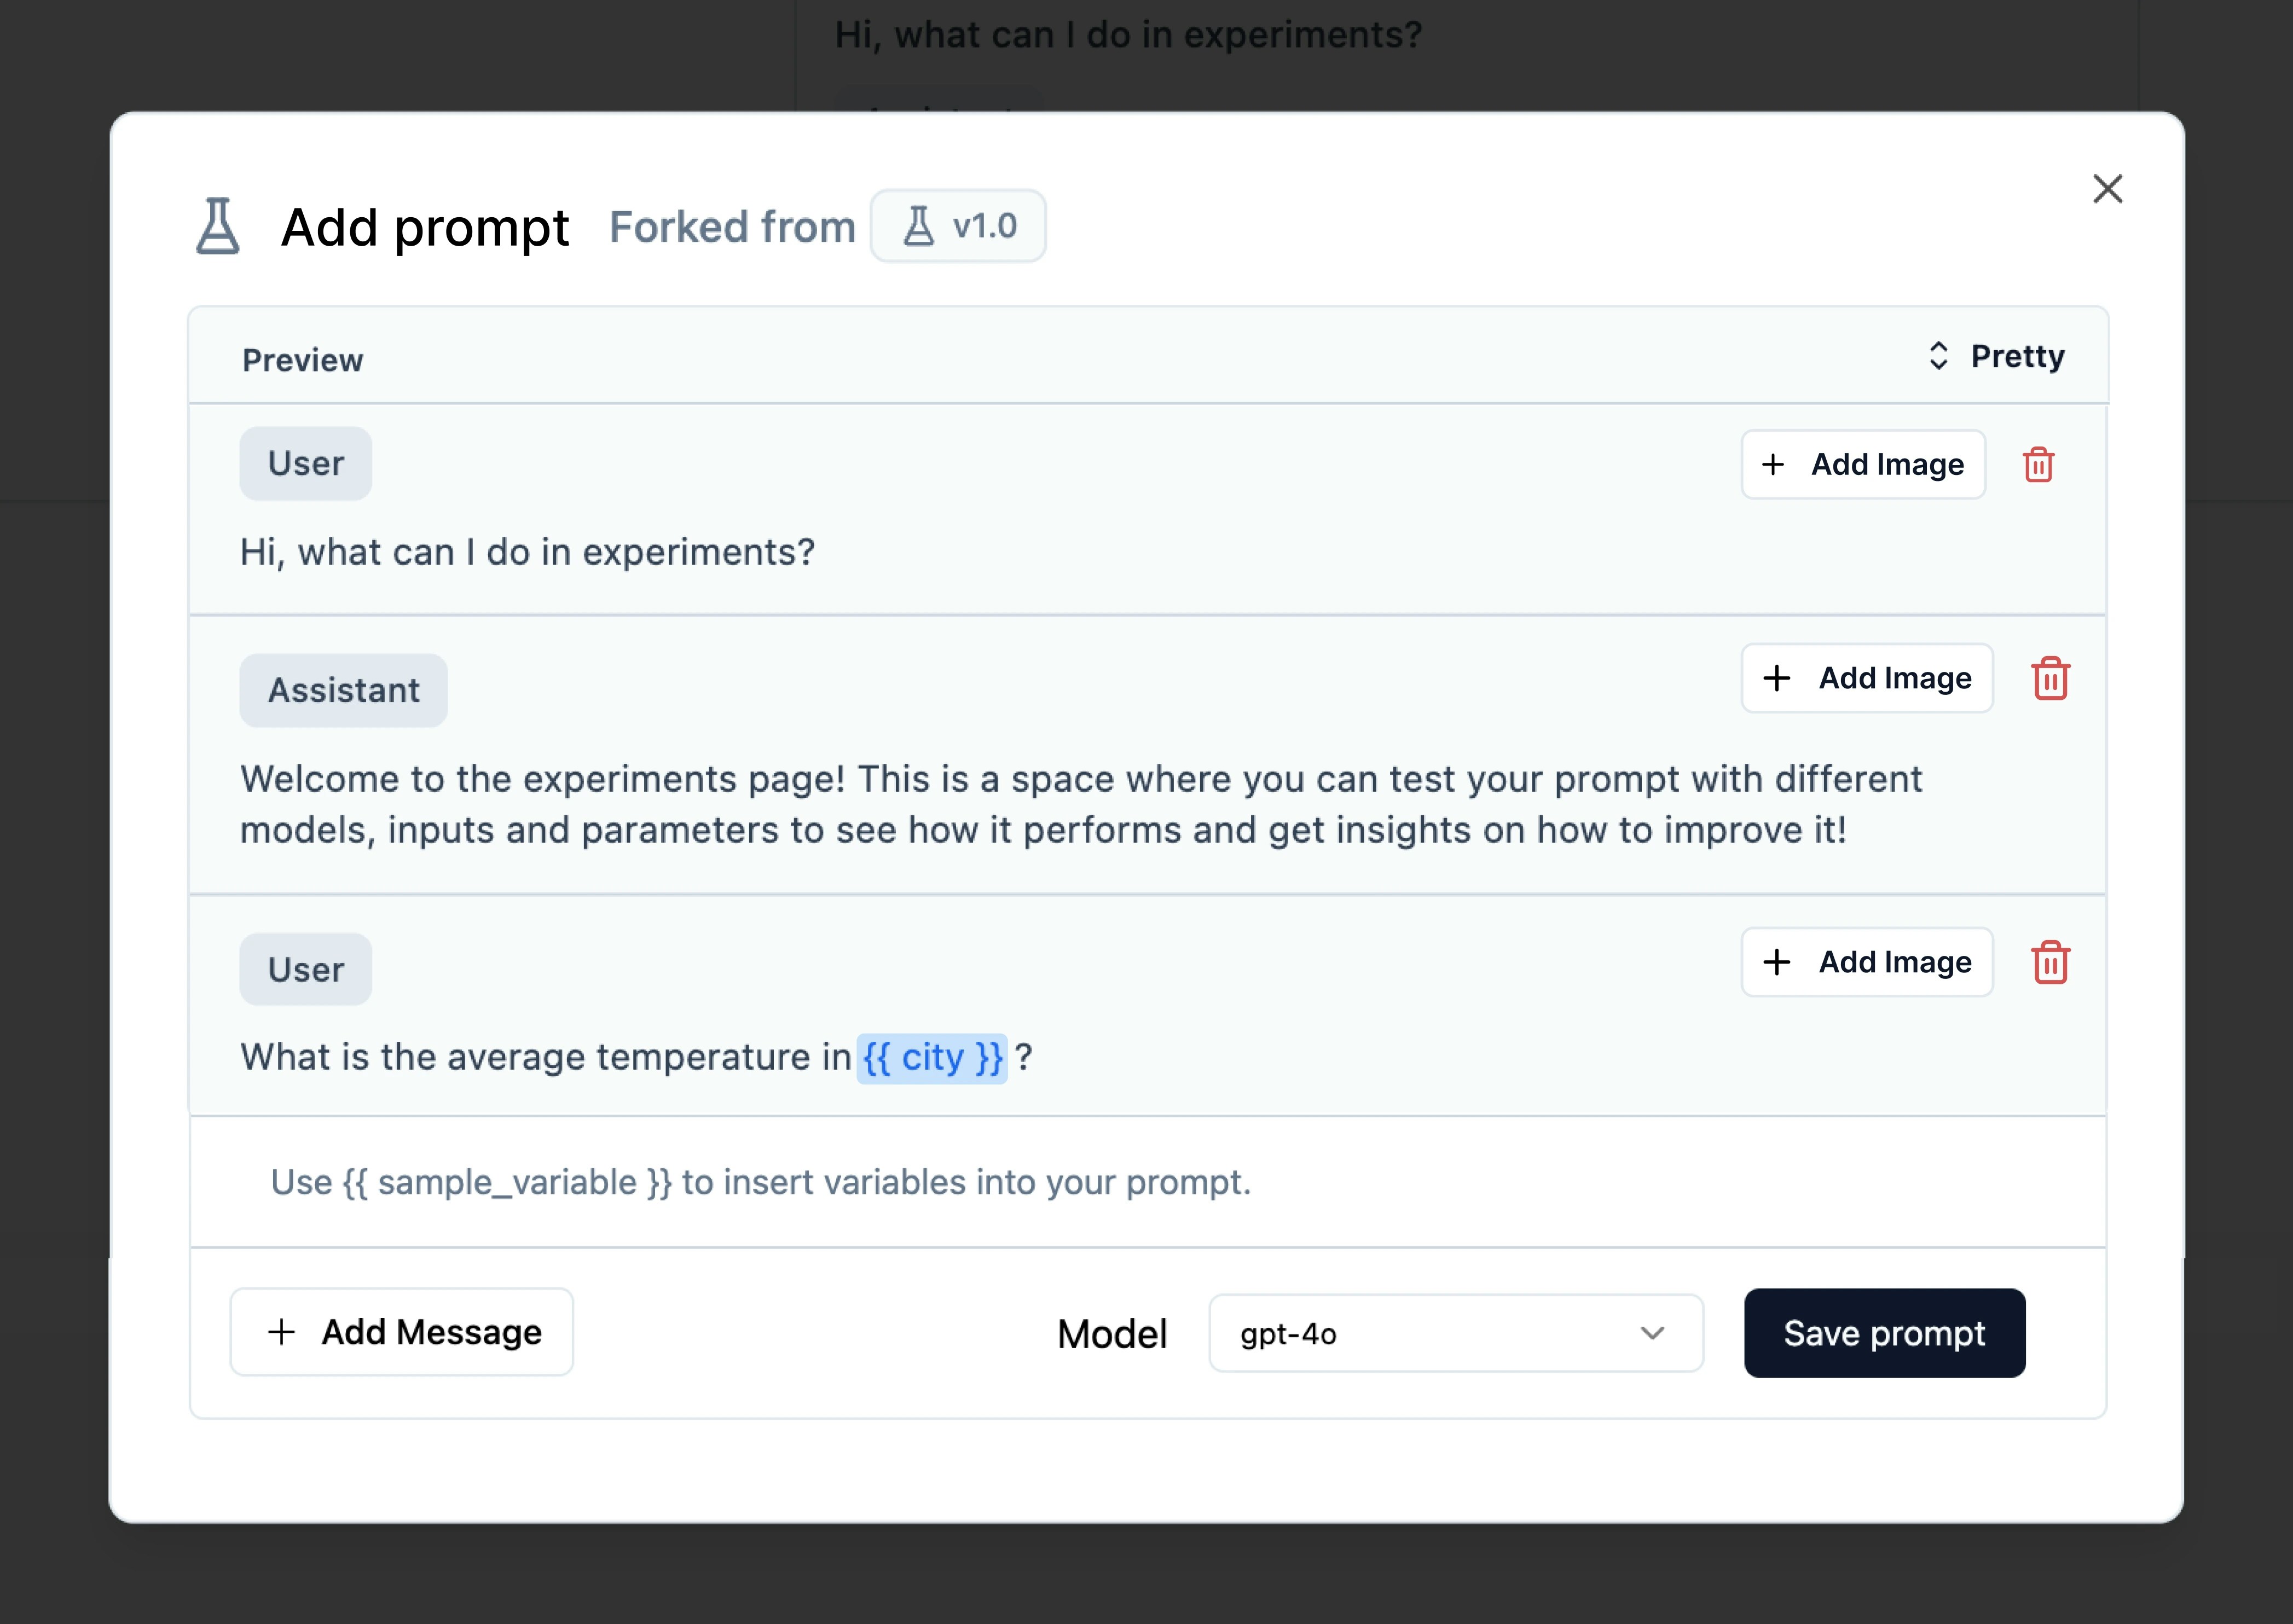
Add prompt variables
Type{{ input_name }} to add input variables in your prompt. These input variables will appear in the Inputs column.
3. Add input rows
The next step is to import golden datasets or your request data in Helicone. There are five ways: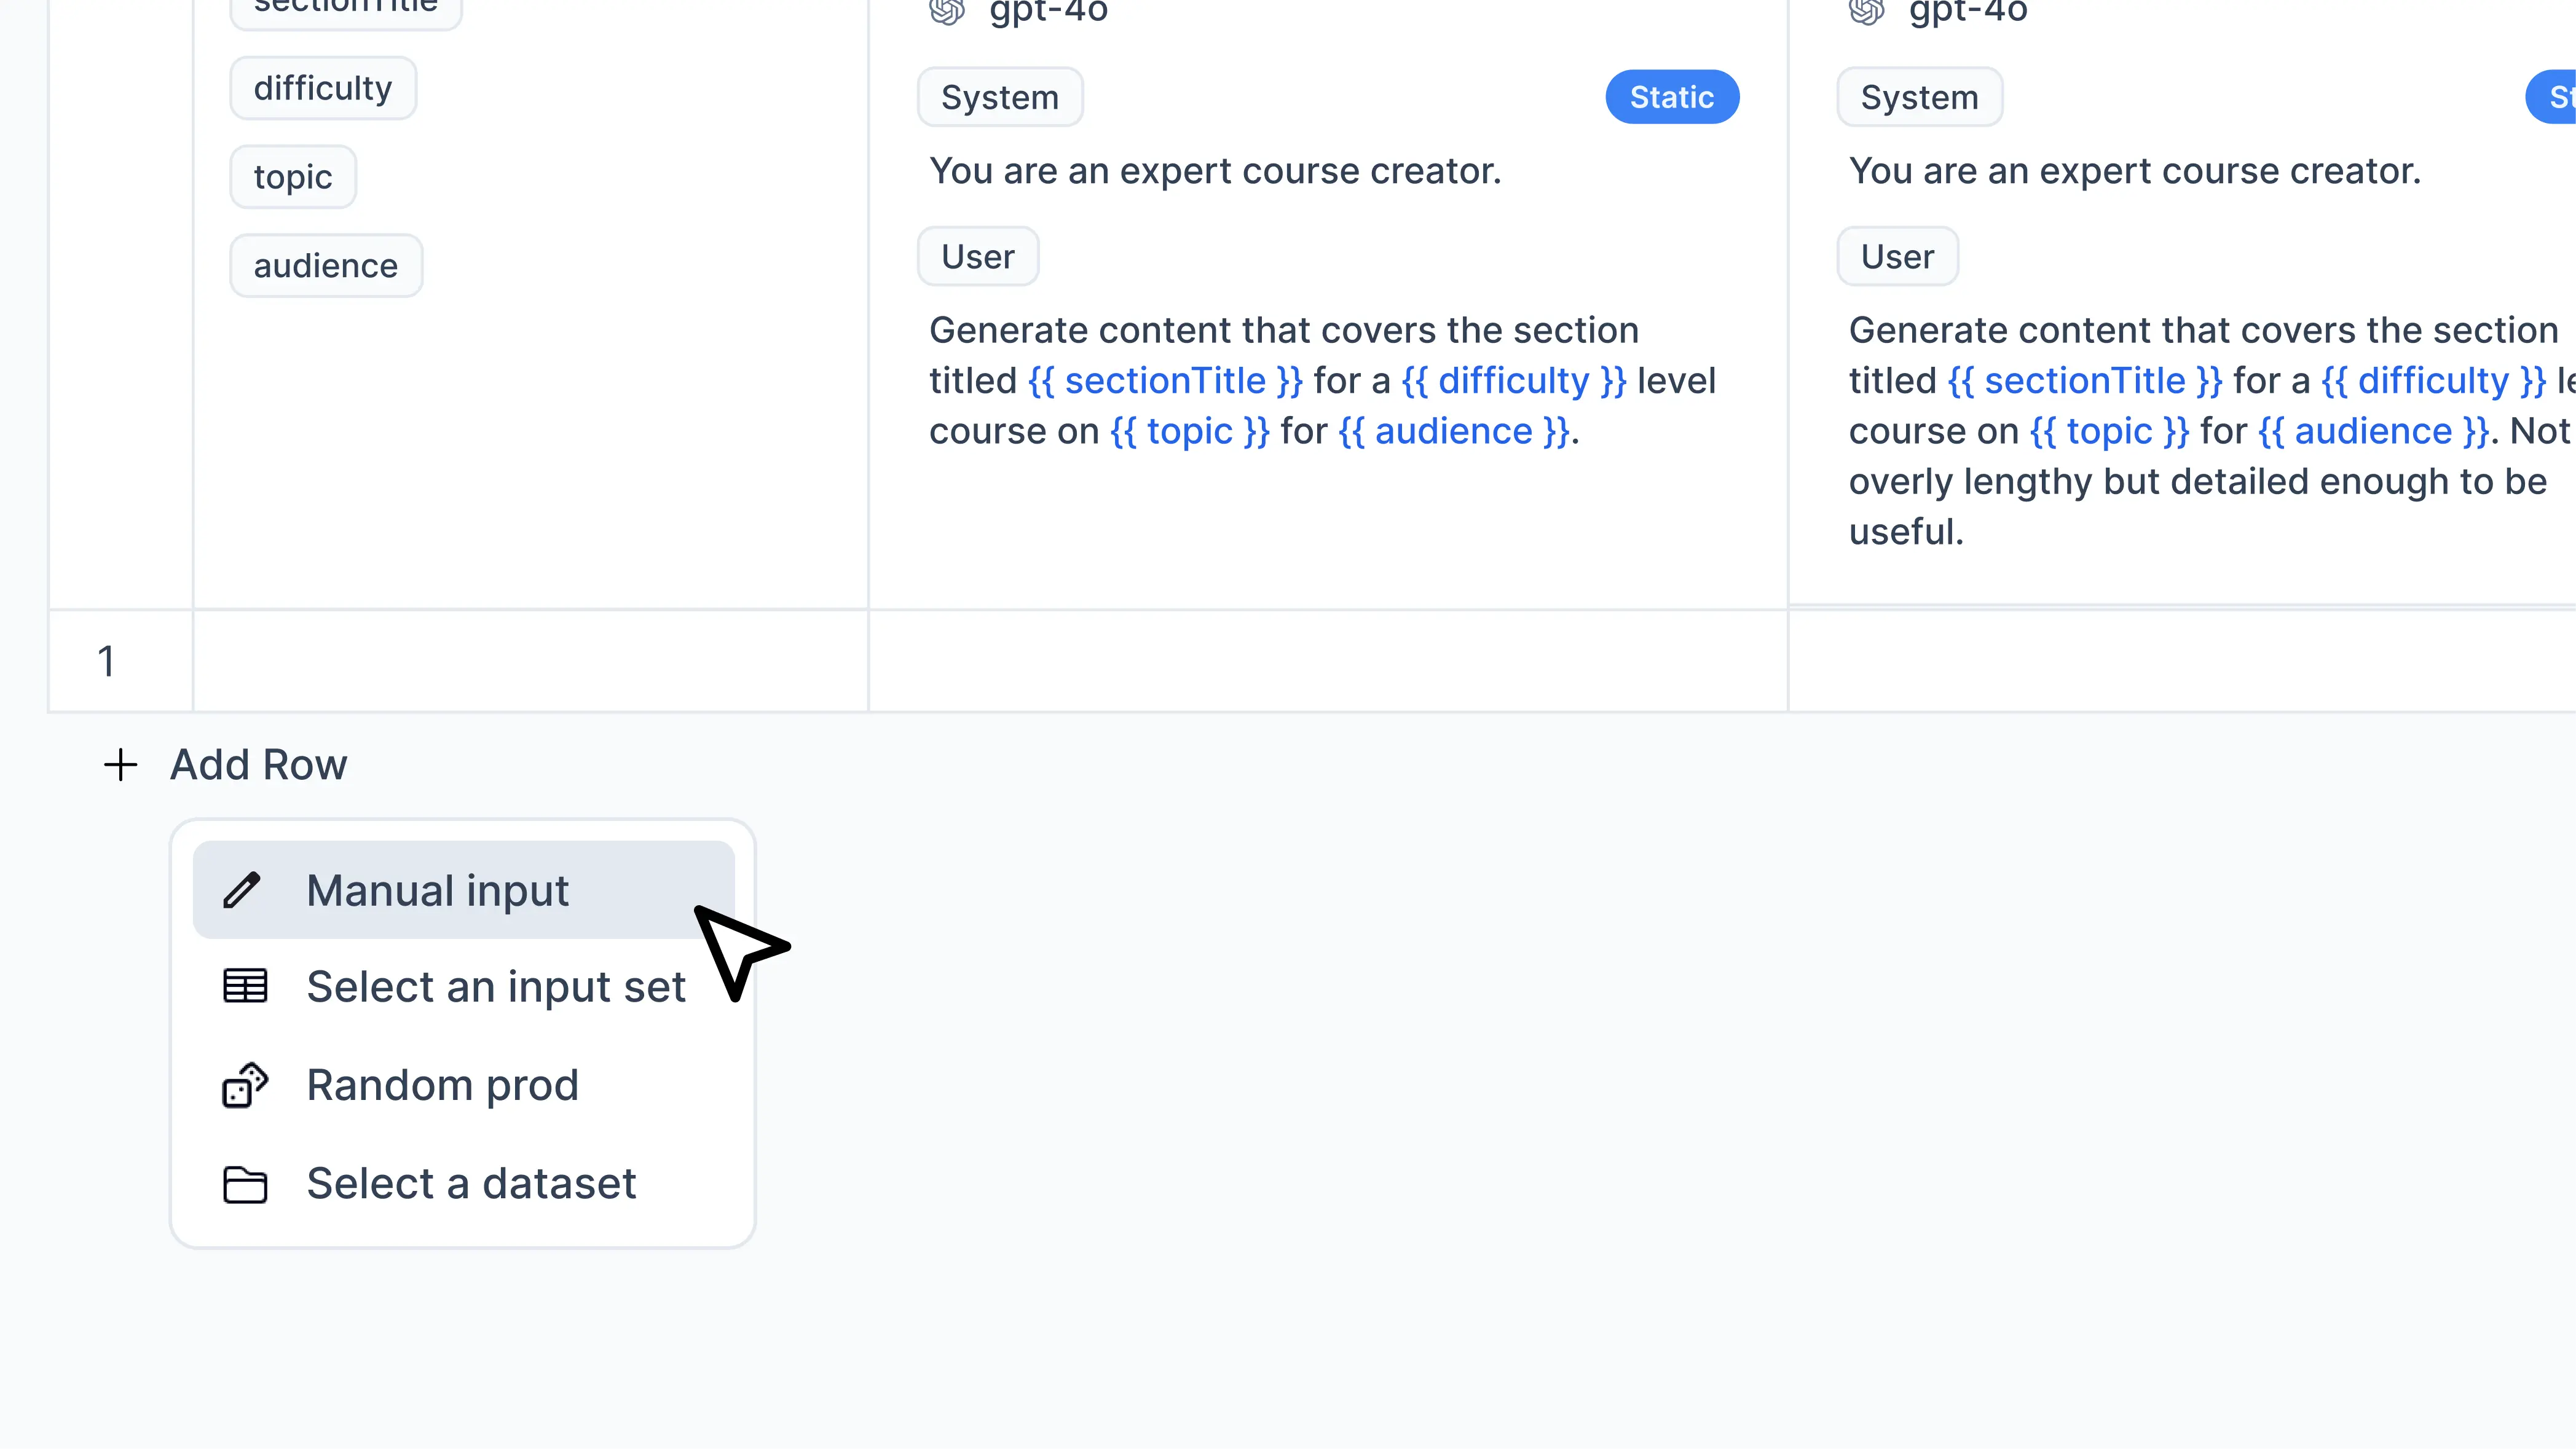
Add manual inputs: Manually enter values for each input variable you defined.Select an input set: Select production request data that matches the same prompt ID.Random prod: Randomly select any number of production request data. We wrote about why this approach is recommended.Add from a dataset: Use datasets you’ve created in Helicone to test your prompt. This allows you to leverage curated collections of test cases for thorough prompt evaluation.Import from CSV: Import data from a CSV file that contains columns matching your input variables. When importing, you can preview the data to ensure it matches your expected format. The preview shows the first few rows of your CSV data and highlights which columns will be used as input variables.
4. Create and run custom evaluators
1
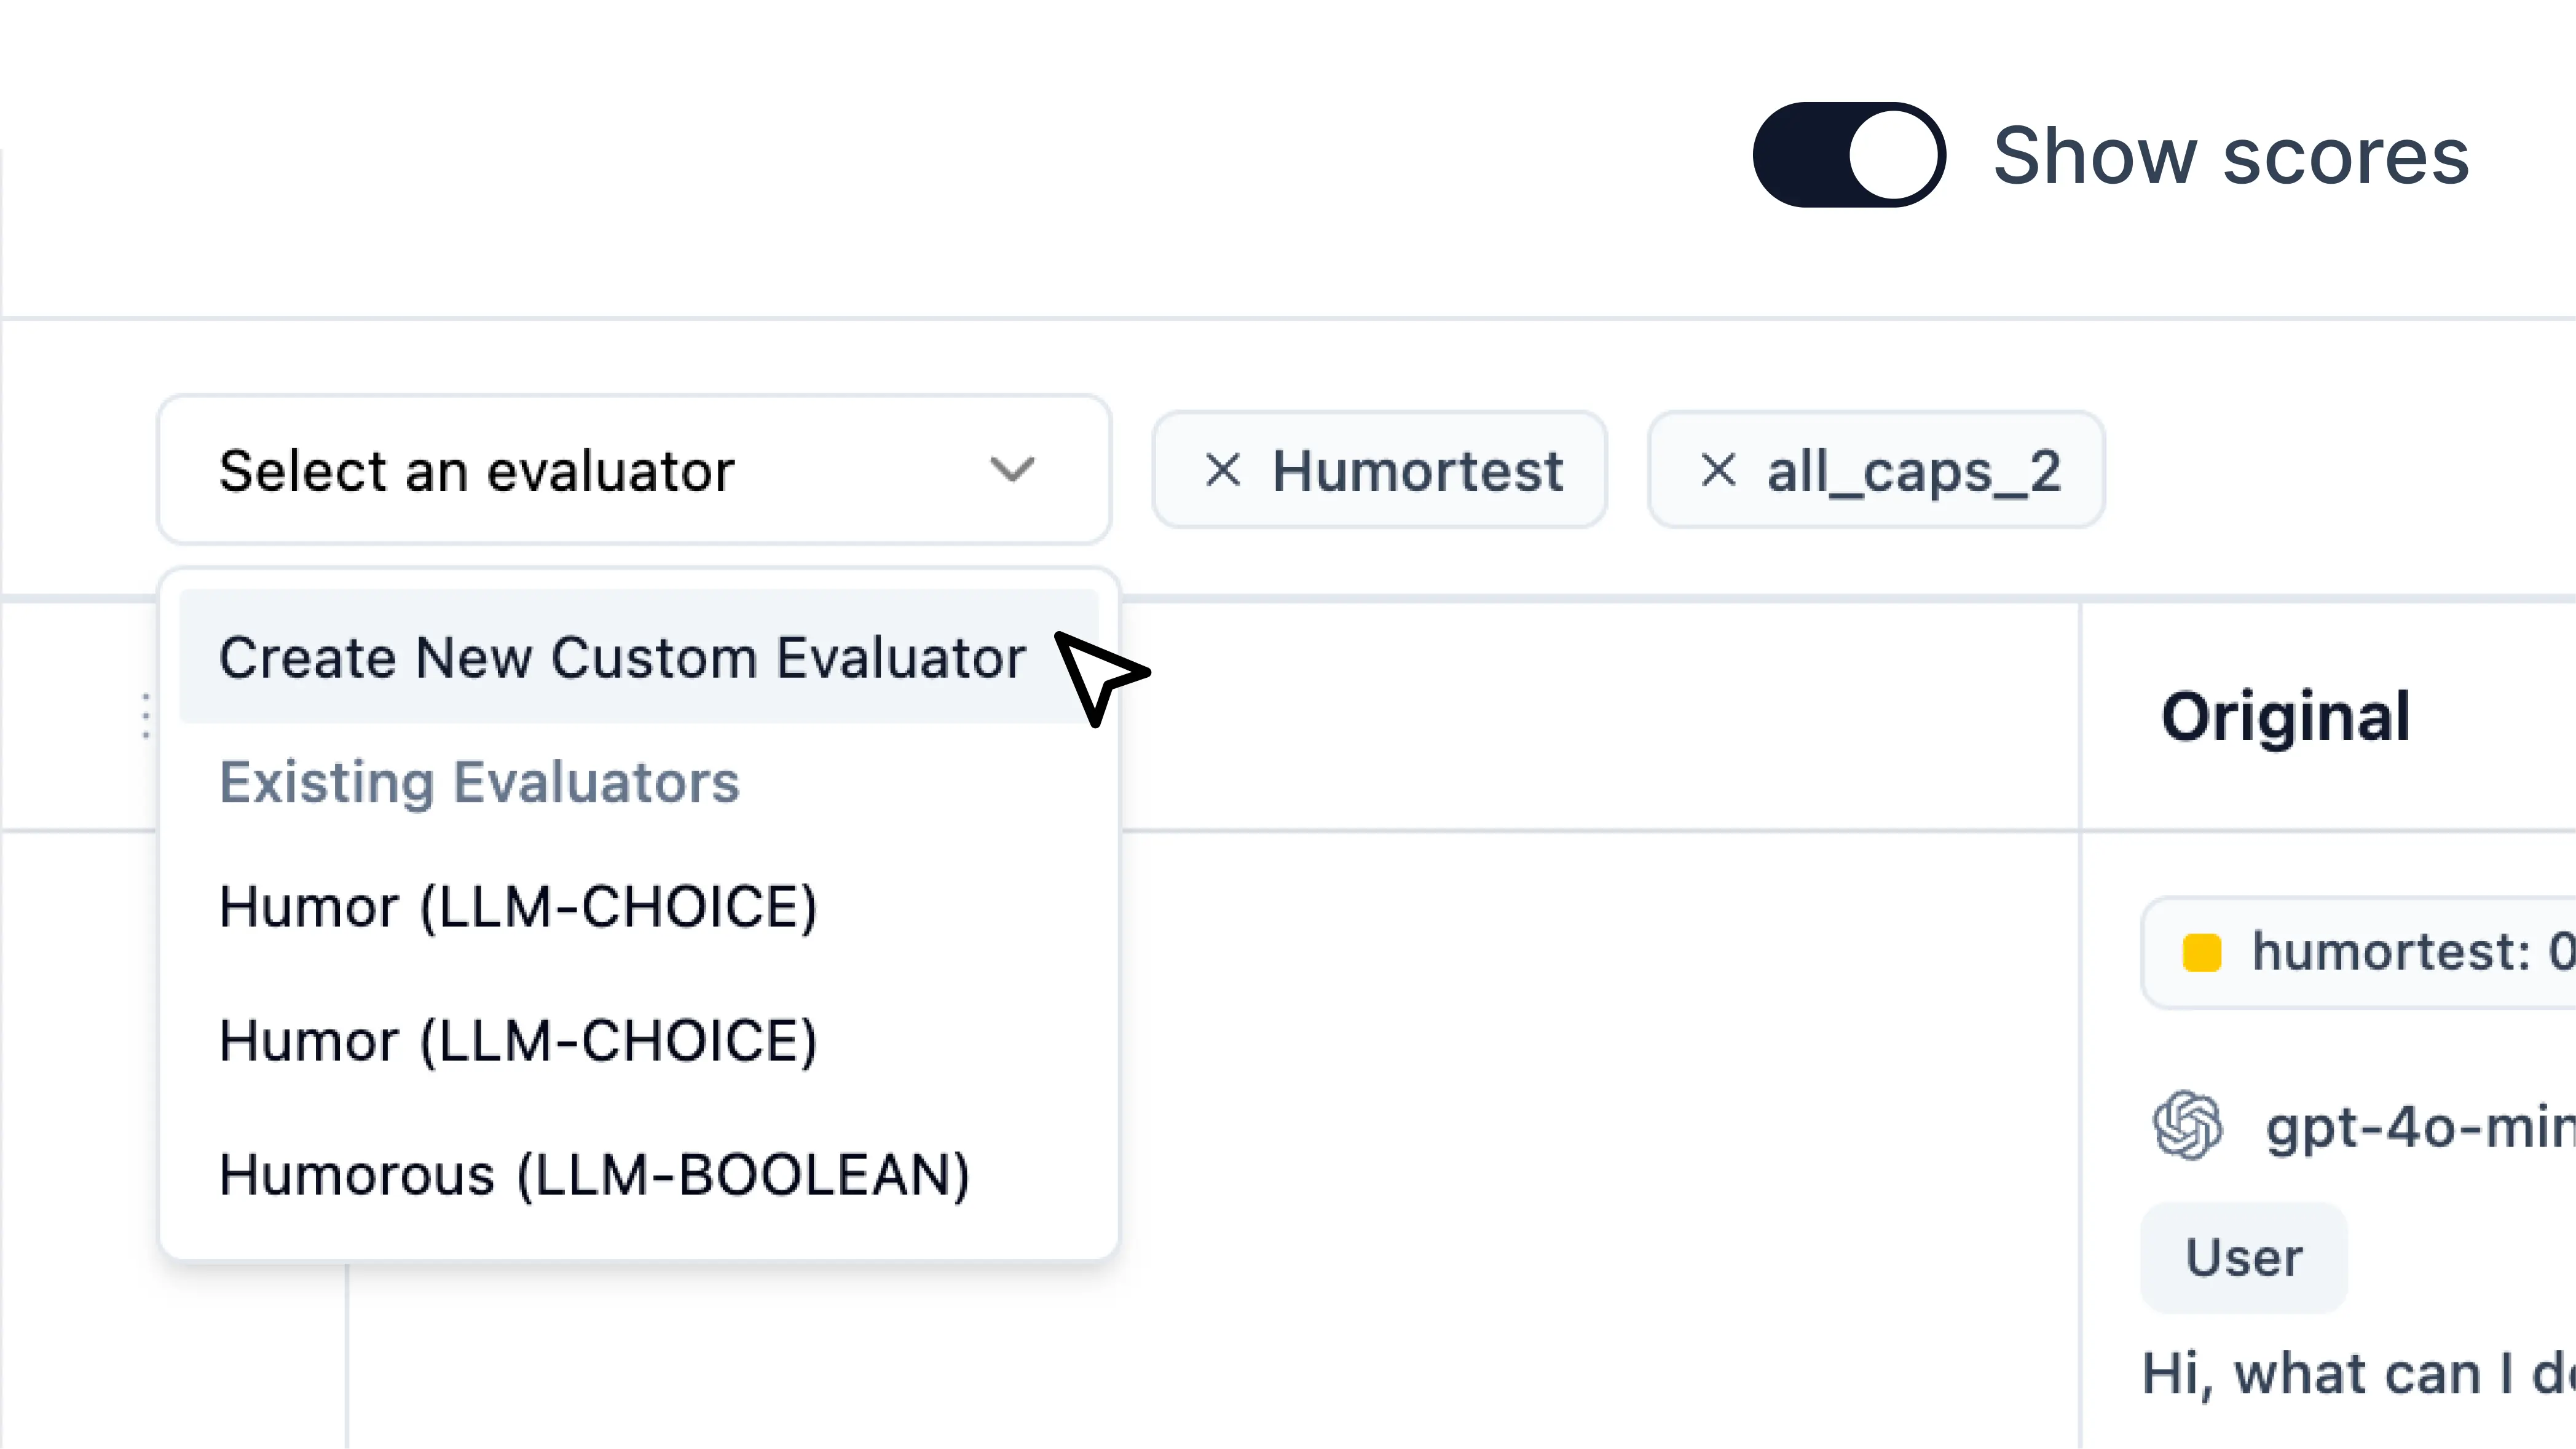
Toggle on `Show scores`.
2
Under the dropdown, select 'Create new custom evaluators'
3
Create the evaluator
On the side panel, you will be able to create a new evaluator. We currently support LLM-as-a-judge; Python and TypeScript support is coming soon!
4
Run Evaluator
Once you add an evaluator, you will notice a warning that prompts you to re-run evaluation. Click on 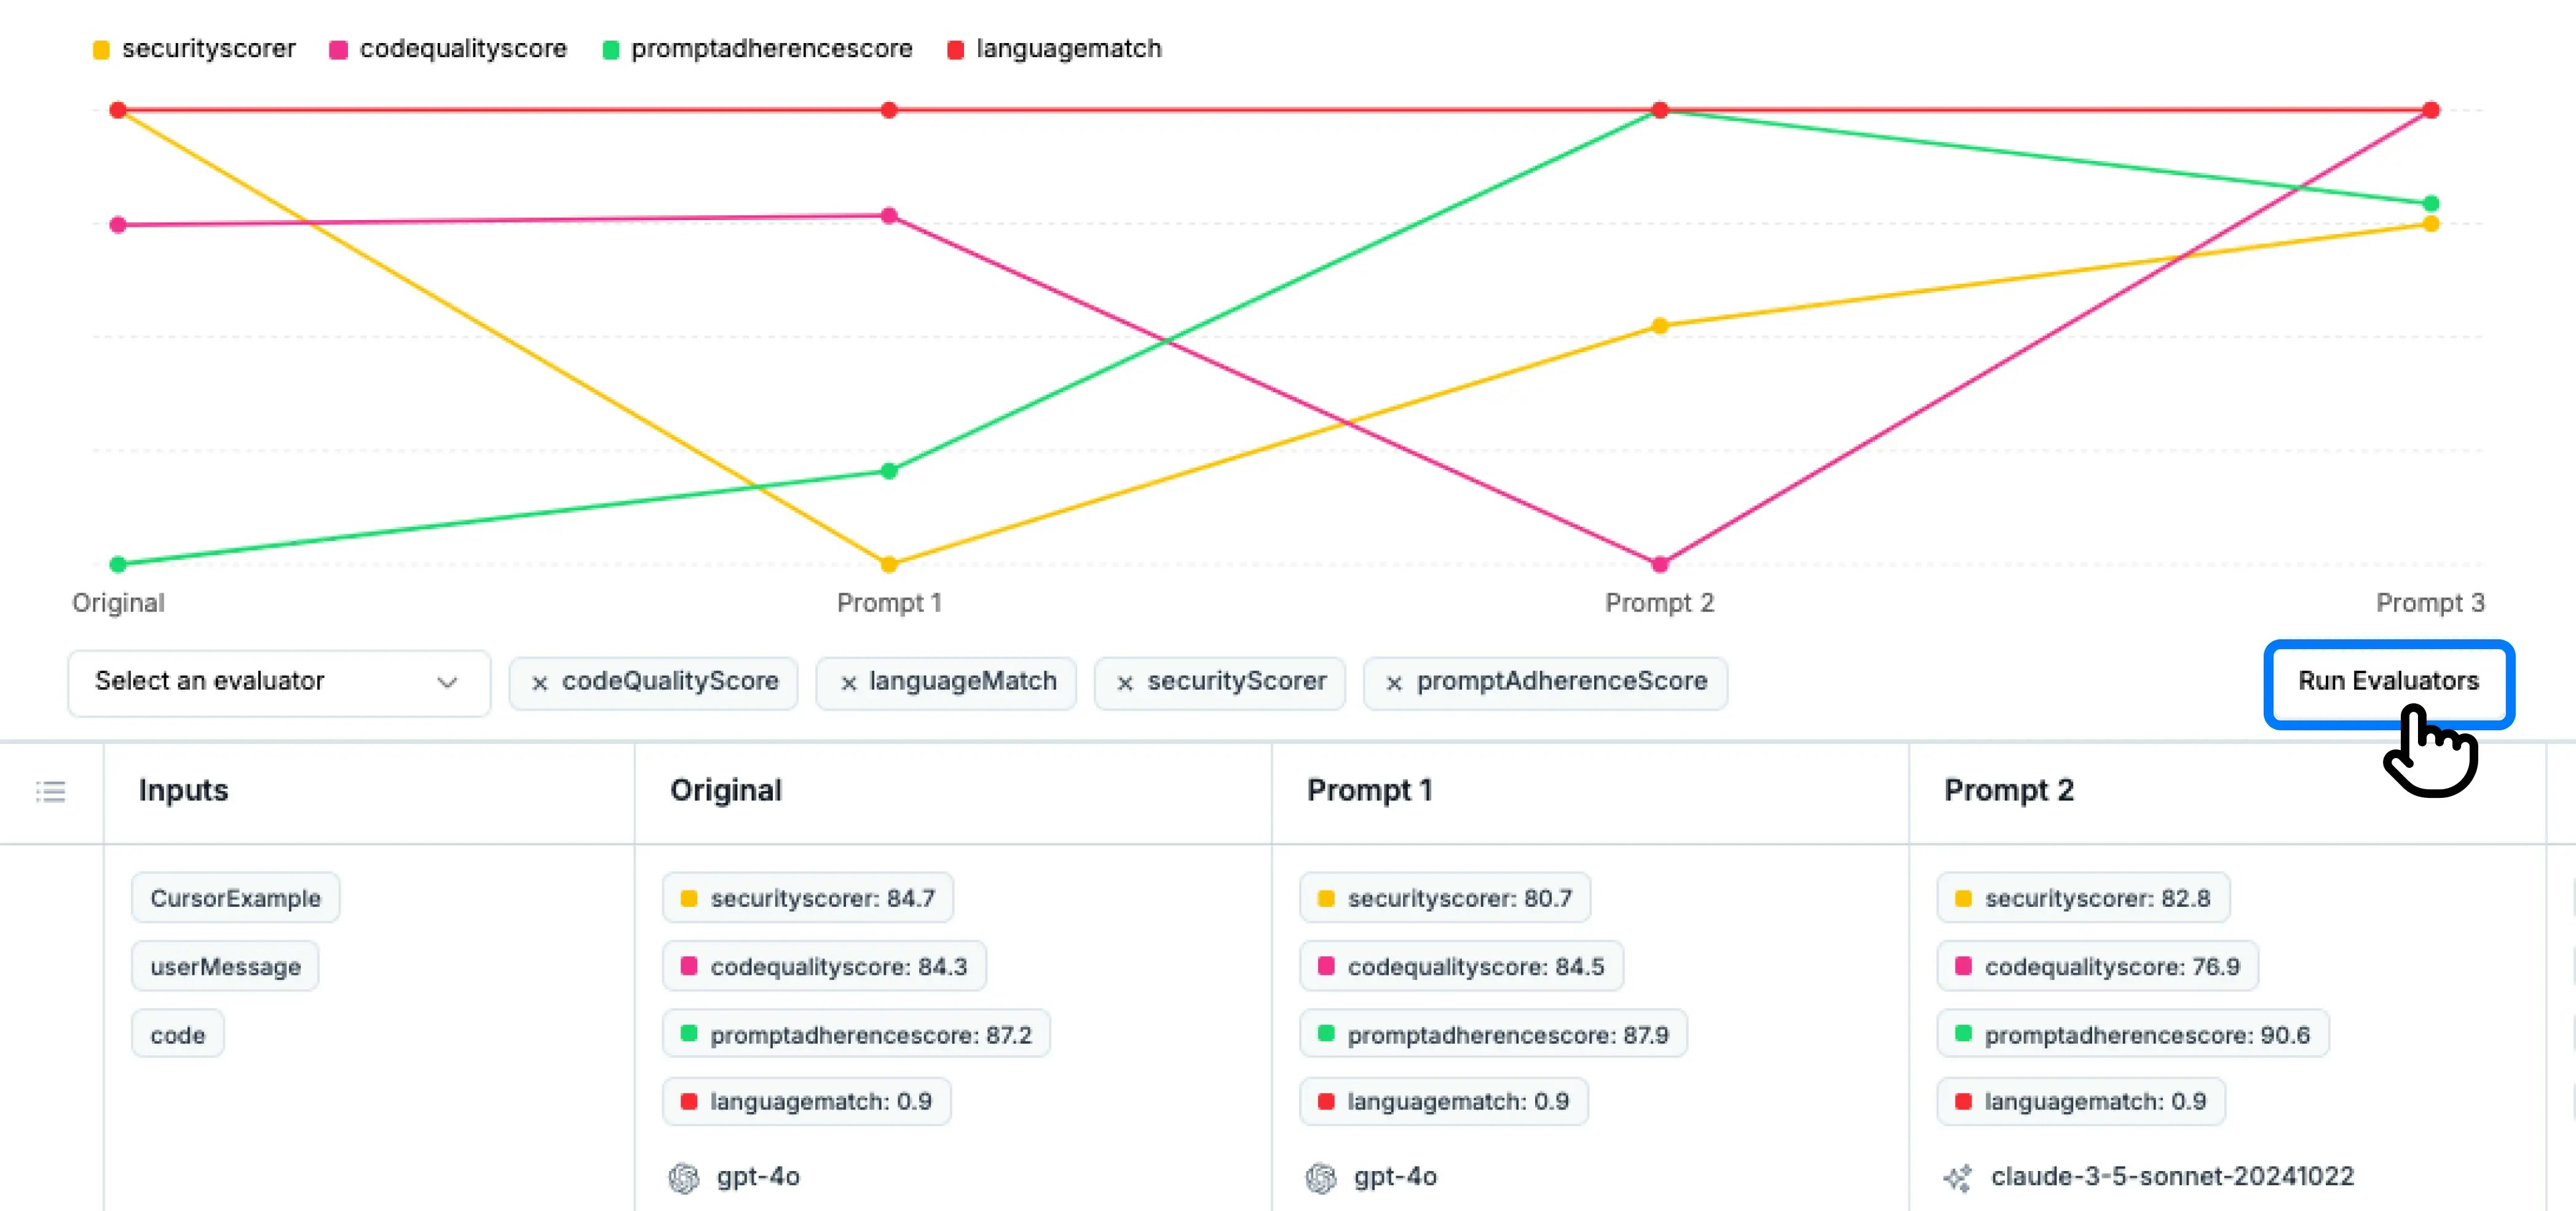
Run Evaluators to see the scores in graph.5
(Optional) View score breakdown
To see the scores breakdown by input, click on an evaluator (humor in this example). You will see individual scores appear in each cell.
Notice that cells that perform above average will have a green indicator. Cells below average will have a red indicator.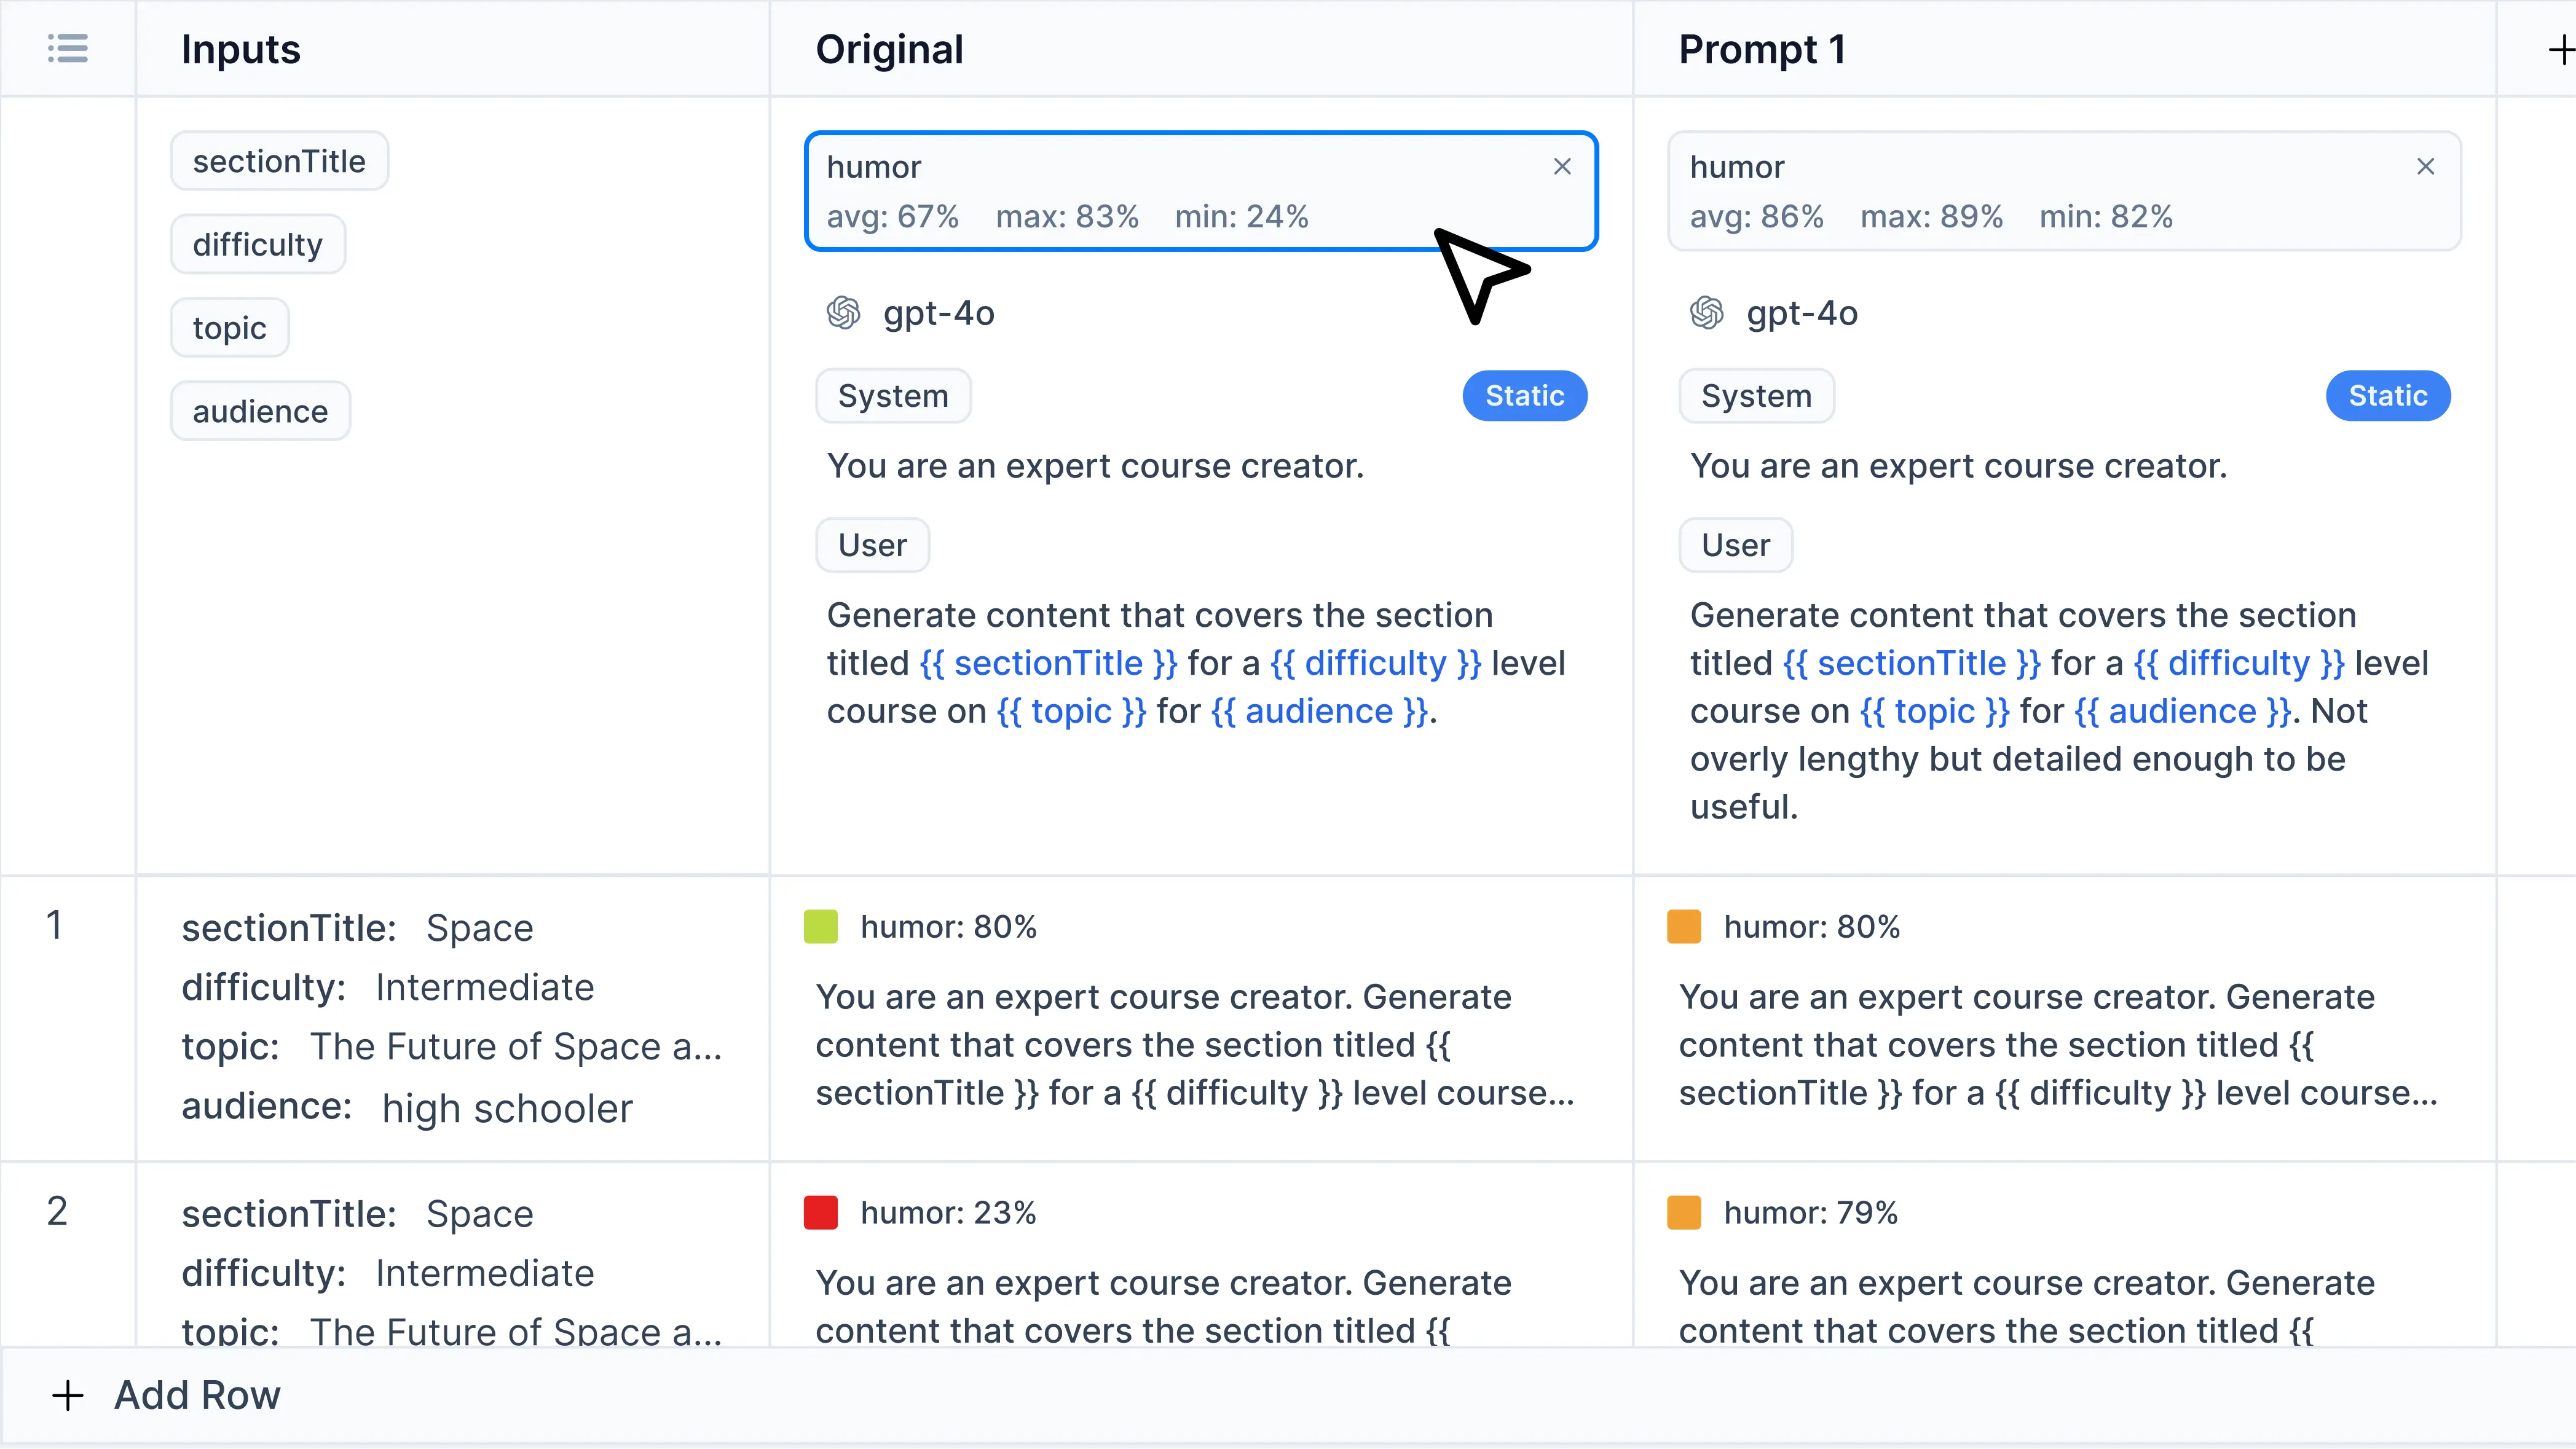
5. Push changes to production
The more prompts you create, the more data points on the scores graph you will see. Keep in mind that prompt engineering is an iterative process. The more input you test, the more edge cases you can cover with your new prompts. Once you are happy with a prompt, copy and paste it into your code for production.Need more help?
Need more help?
Additional questions or feedback? Reach out to
help@helicone.ai or schedule a
call with us.