

Introduction
We’ll be building a simple chatbot that can query an API to respond with detailed flight information. But first, you should know that Structured Outputs can be used in two ways through the API:- Function Calling: You can enable Structured Outputs for all models that support tools. With this setting, the model’s output will match the tool’s defined structure.
- Response Format Option: Developers can use the
json_schemaoption in theresponse_formatparameter to specify a JSON Schema. This is for when the model isn’t calling a tool but needs to respond in a structured format. Whenstrict: trueis used with this option, the model’s output will strictly follow the provided schema.
How the chatbot works
Here’s a high-level overview of how our flight search chatbot will work: It will extract parameters from a user query, call our API with Function Calling, and then structure the API response in a predefined format with Response Format. Let’s get into it!What you’ll need
Before we get started, make sure you have the following in place:- Python: Make sure you have Python installed. You can grab it from here.
- OpenAI API Key: You’ll need this to get a response from OpenAI’s API.
- Helicone API Key: You’ll need this to monitor your chatbot’s performance. Get one for free here.
Setting up your environment
First, install the necessary packages by running:.env file in your project’s root directory and add your API keys:
Understanding the code
Let’s break down the code and see how it all fits together.Pydantic Models
We start with a few Pydantic models to define the data we’re working with. While Pydantic is not necessary (you can just define your schema in JSON), it is recommended by OpenAI.- FlightSearchParams: Holds the user’s search criteria (departure, arrival, and date).
- FlightDetails: Stores details about each flight.
- ChatbotResponse: Formats the chatbot’s response, including both structured flight details and a natural language explanation.
The FlightChatbot Class
This is the main class describing the Chatbot’s functionality. Let’s take a look at it.Initialization
Here, we initialize the chatbot with your OpenAI API key and a small sample database of flights.Searching for flights
Next, we define the_search_flights method.
Processing user queries
Now we process user input to extract search parameters and find matching flights:- Extracts parameters from the user’s query using OpenAI’s function calling.
- Searches for matching flights.
- Generates a response from the results of the search in the
ChatbotResponseformat—a structured response consisting of flight data and a natural language response.
Monitoring query refusals with Helicone
Structured outputs come with a built-in safety feature that allows your chatbot to refuse unsafe requests. You can easily detect these refusals programmatically. Since a refusal doesn’t match theresponse_format schema you provided, the API introduces a refusal field to indicate when the model has declined to respond. This helps you handle refusals gracefully and prevents errors when trying to fit the response into your specified format.
But what if you want to review all the queries your chatbot refused—perhaps to identify any false positives? This is where Helicone comes into play.
With Helicone’s request logger, you can view details of all requests made to your chatbot and easily filter for those containing a refusal field. This gives you instant insight into which requests were declined, providing a solid starting point for improving your code or prompts.
How it works
1
2
Edit the OpenAI initialization snippet
This is the code you’ll need to add to your chatbot to log all requests in
Helicone.
3
Navigate to your Helicone dashboard
The dashboard is where you can view and filter requests. Simply filter for those with a refusal field to quickly see all instances where your chatbot refused to respond.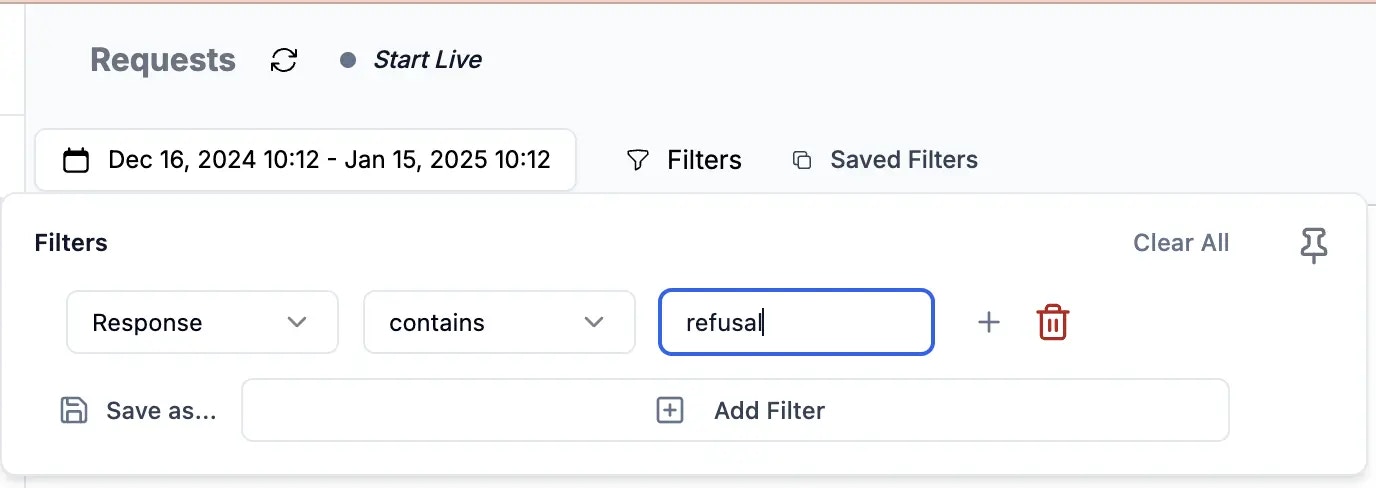
4
And that's it!
In just a few steps, you can review all refusal responses and optimize your chatbot as needed.
Putting it all together
So, let’s bring it all together with a simplemain function that serves as our entry point:
Here’s the entire script
Running the chatbot
- Make sure your
.envfile is set up with your API keys. - Run the script:
What’s next?
Just integrated with Helicone?
Explore top features like custom properties, prompt experiments, and more.